Efficient event check-in is critical for ensuring a smooth and professional experience for attendees. With Just Attend’s event badge printing software, you can seamlessly manage attendee check-ins and onsite badge printing, enhancing both operational efficiency and attendee satisfaction.
Our cutting-edge event badge printing software integrates directly with your event registration system. It validates tickets, checks in attendees, and prints personalized badges instantly. Here are its key benefits:
Our event badge printing software is designed to empower event organizers with tools that simplify operations:
To use Just Attend’s event badge printing software, you’ll need:
For optimal results, we recommend:
You can source badge labels directly from us, including pre-printed options for branded designs.
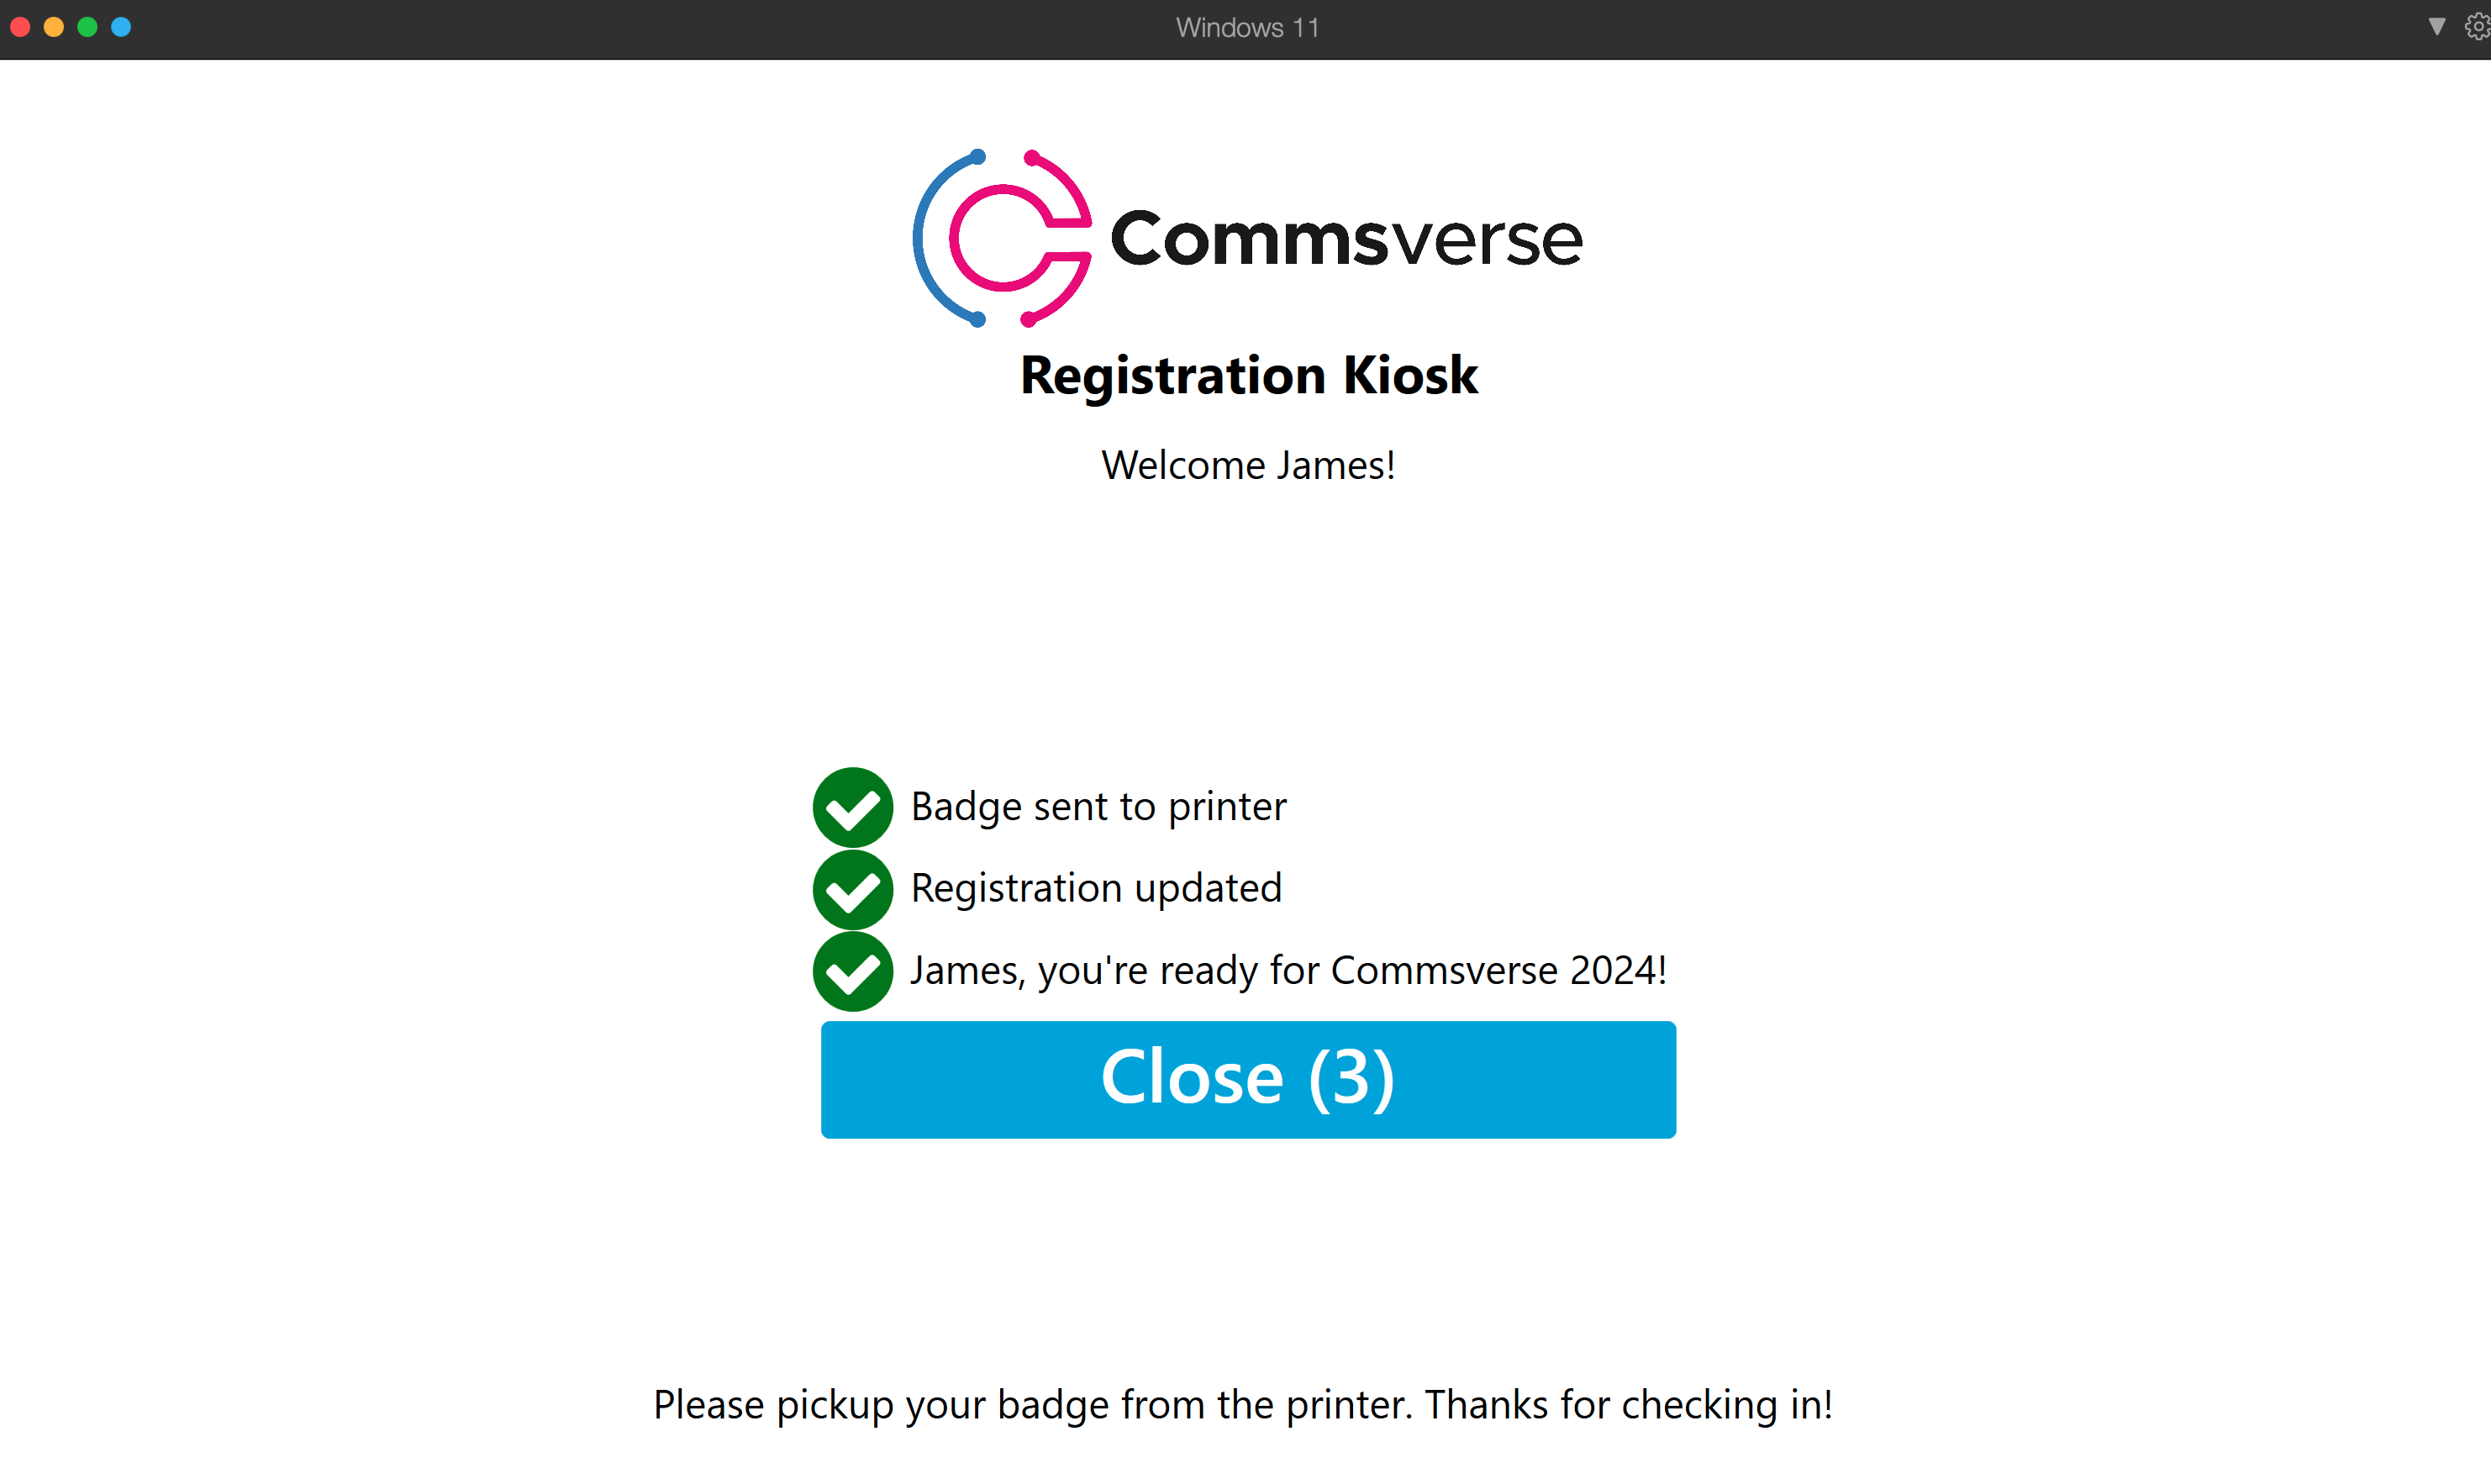
Create professional and unique event badges with our customizable templates. Options include:
Add details like Wi-Fi credentials or QR codes linking to the event agenda on the back of the badge for added utility.
You’ll need to set your kiosk up at your registration location at a comfortable height for your attendees to use whilst standing up. A normal table or bar counter will be fine.
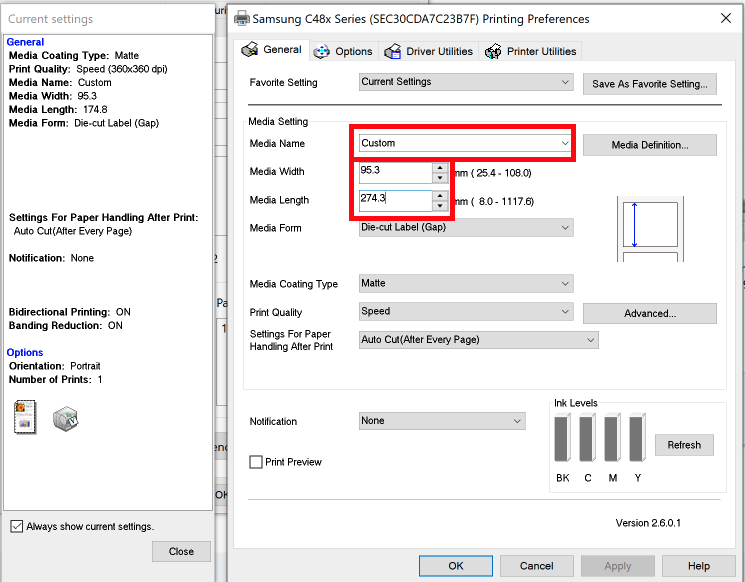
Connect your QR code scanner and printer to your laptop. You’ll need to ensure the printer software driver is set up for the badge size you’re printing.
If you’re using our standard inkjet badges and the Epson C3500 printer, the following settings can be used
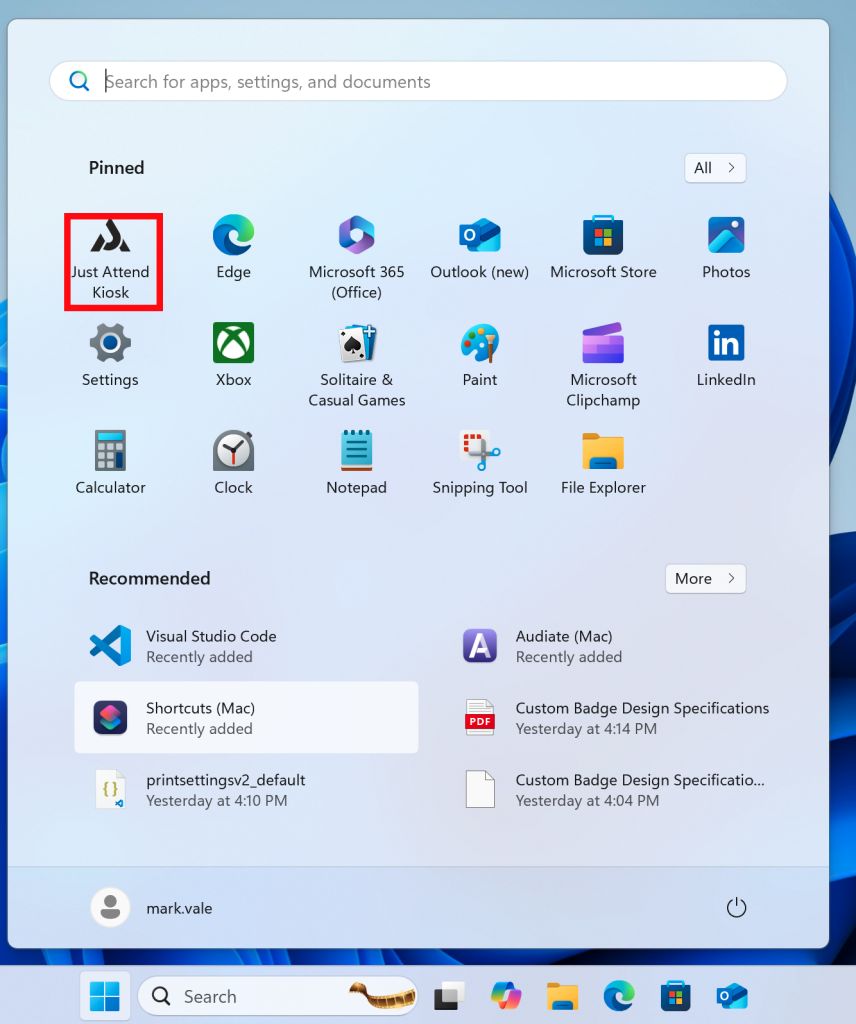
Install (if not already) the Just Attend Badge Printing Software onto your machine. Then launch the program by going to Start > Just Attend Kiosk
Login with your event admin username and password

Select the conference you want the kiosk to connect to from the drop down list.
Next, you’ll need to configure the kiosk to use the correct printer, QR code scanner, and enter your Kiosk Pin.
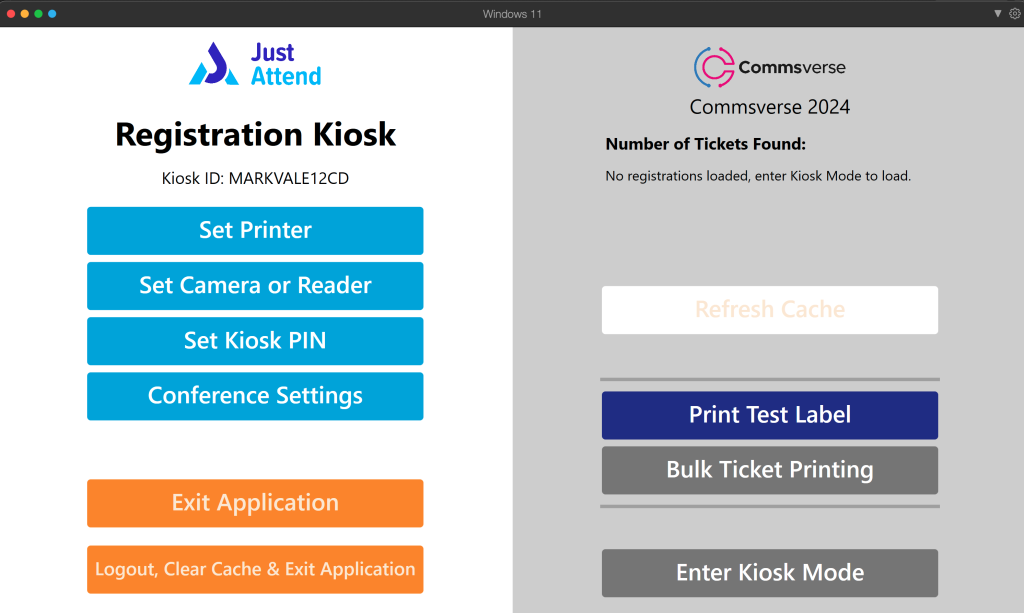
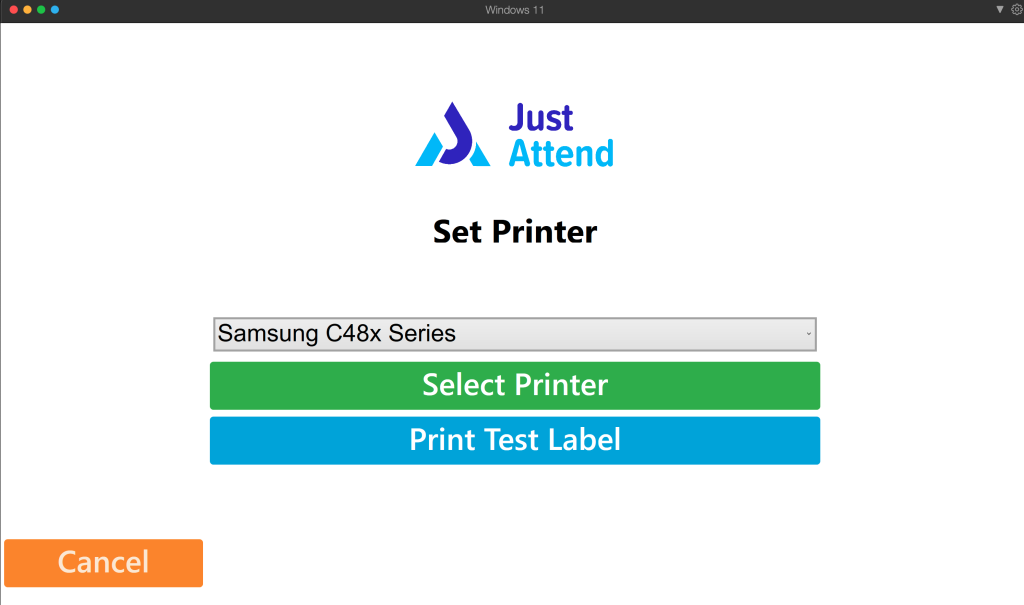
Click on Set Printer, and select your badge printer and save.
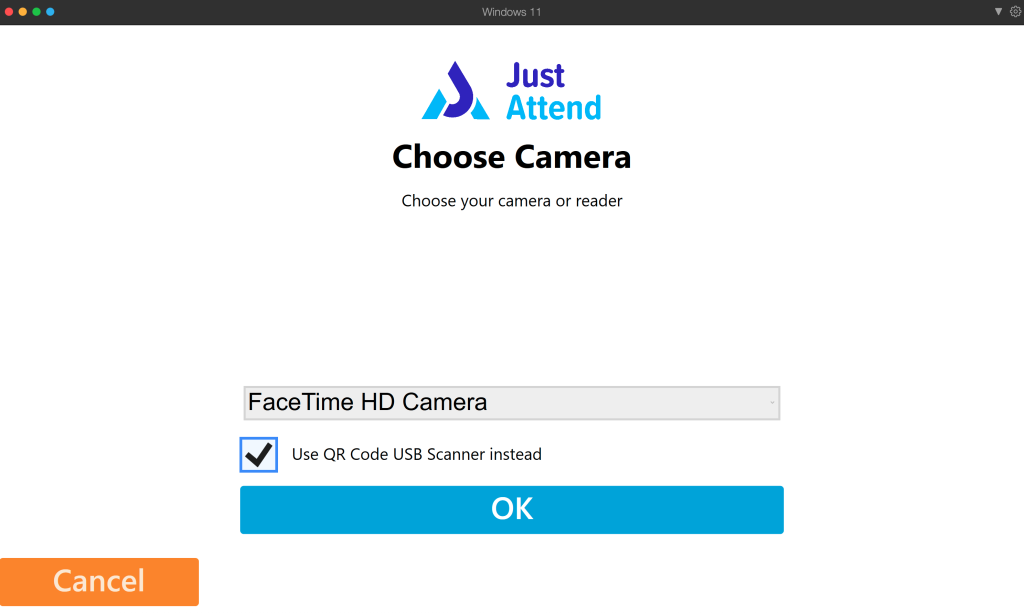
Next go to Set Camera or Reader and select your camera, or check the box if you’re using a QR code scanner and press OK.
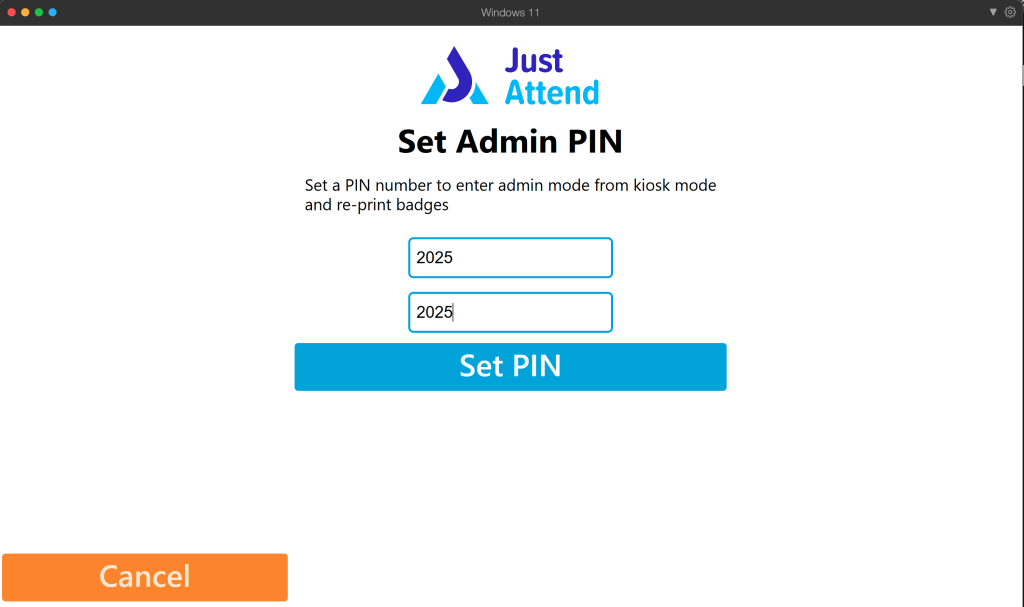
Now, set your Kiosk Pin. This pin number allows you to exit the kiosk mode and also override any validation when a ticket is scanned. For example, if an attendee arrives on the wrong day and their ticket is not valid, you can enter the code when prompted to print and check them in.
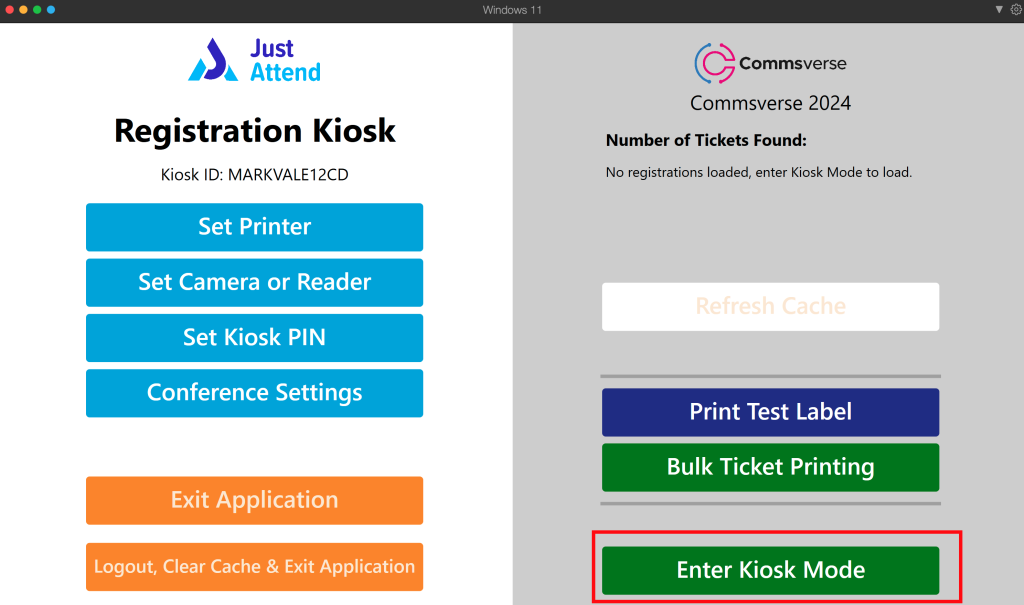
Now you’re ready to start using the Kiosk. You’ll notice the Enter Kiosk Mode button is now lit up green.
If you want to change the Kiosk name or turn off ticket validation entirely so the kiosk will print name badges as long as there is a ticket for the person regardless of valid date or if they’ve already checked in, click on conference settings and change them there.
We recommend that you only do this if you’re testing the software.
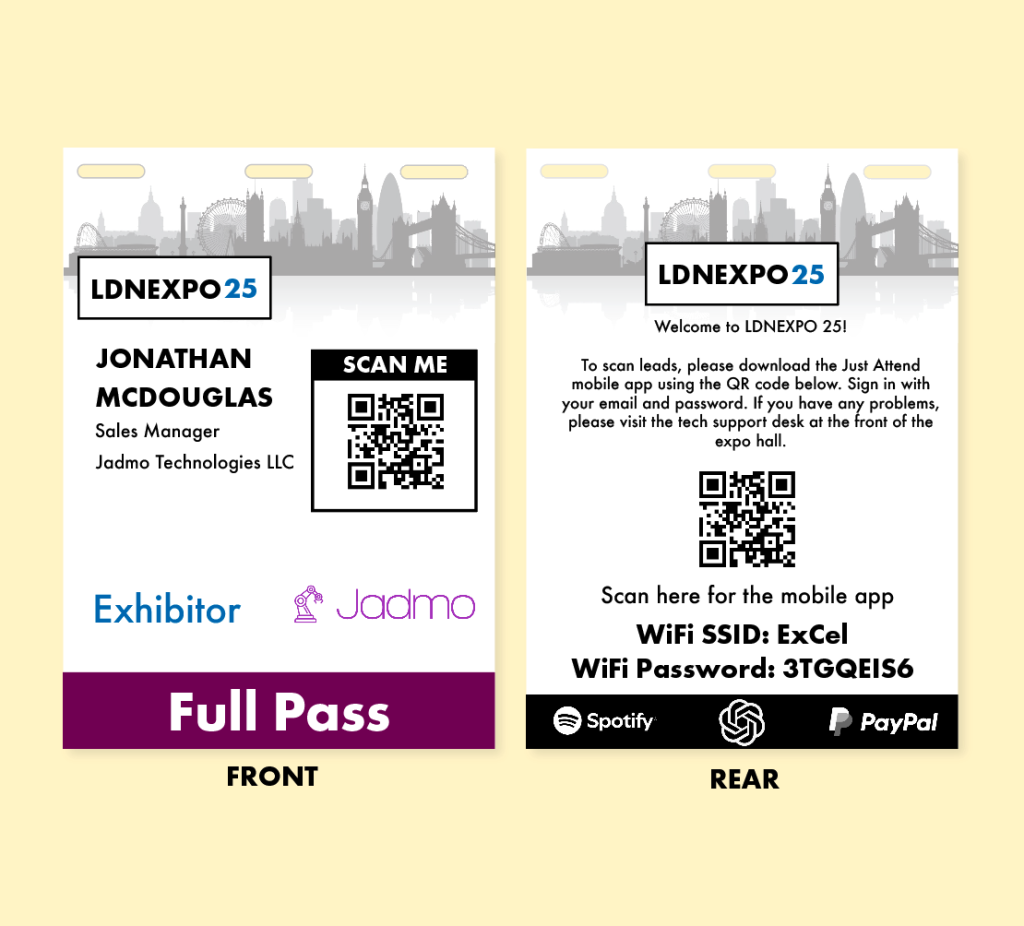
Now enter kiosk mode. The application will temporarily close and re-open in kiosk mode:
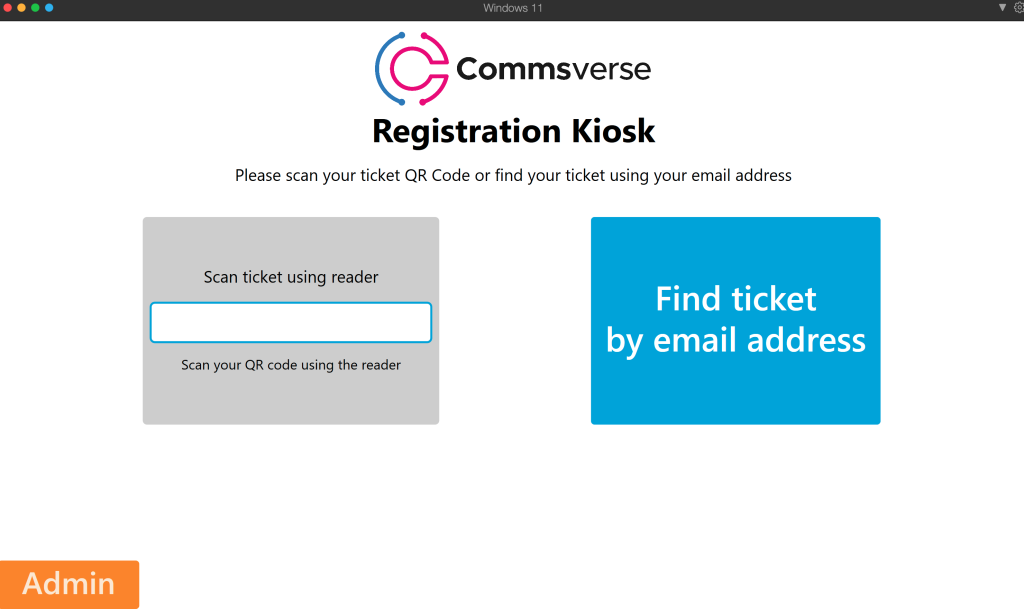
Now all the attendees need to do is show their ticket QR code to the reader and the kiosk will automatically check them in and print their badge.

That’s it! It’s as simple as that. After 5 seconds, the kiosk will automatically return to the home screen ready for the next attendee.
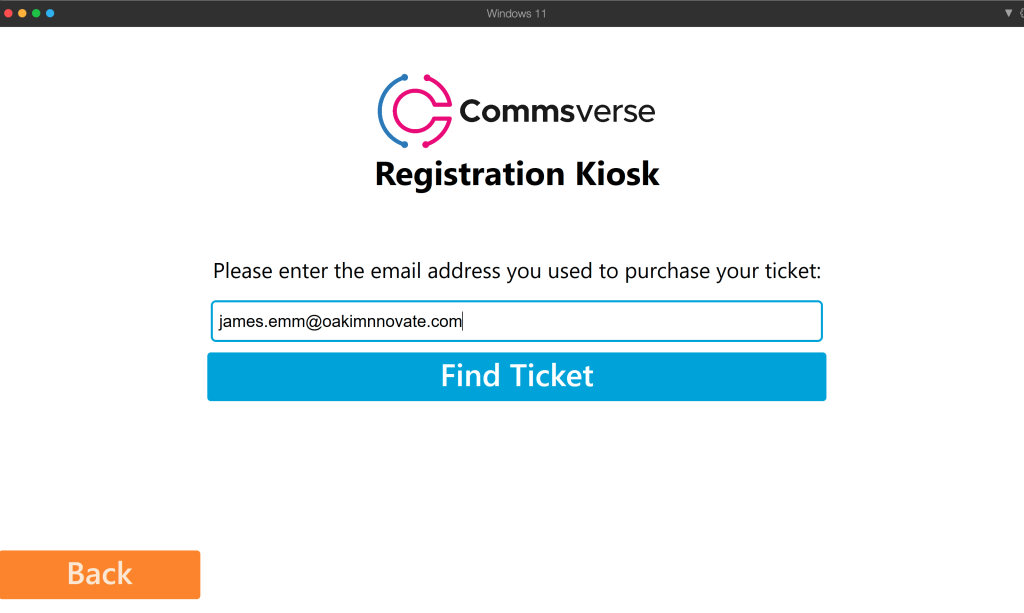
Of course, there will be people who arrive who cannot find their ticket. That’s no problem, they can enter their email address into the kiosk instead.
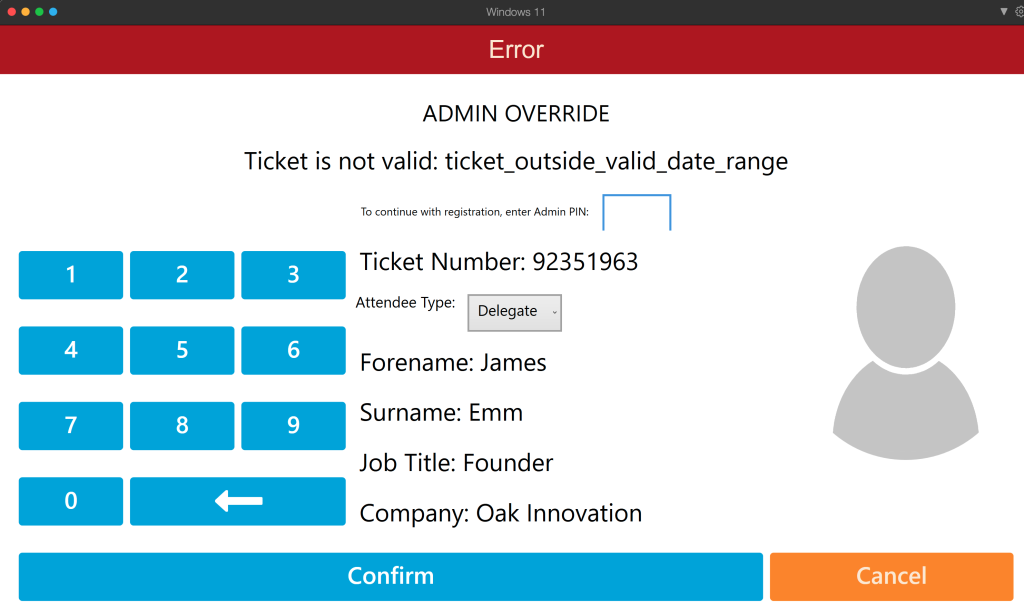
If a ticket has been printed already, or the ticket valid date is out of range, then the kiosk will flag an error.

You can use your kiosk pin to override this warning and print the badge anyway. This is useful if an attendee has lost or damaged their badge and needs a reprint.
A normal attendee will have one role within your event, e.g. attendee. When a single role is found, the kiosk will automatically print the badge design relating to that role.
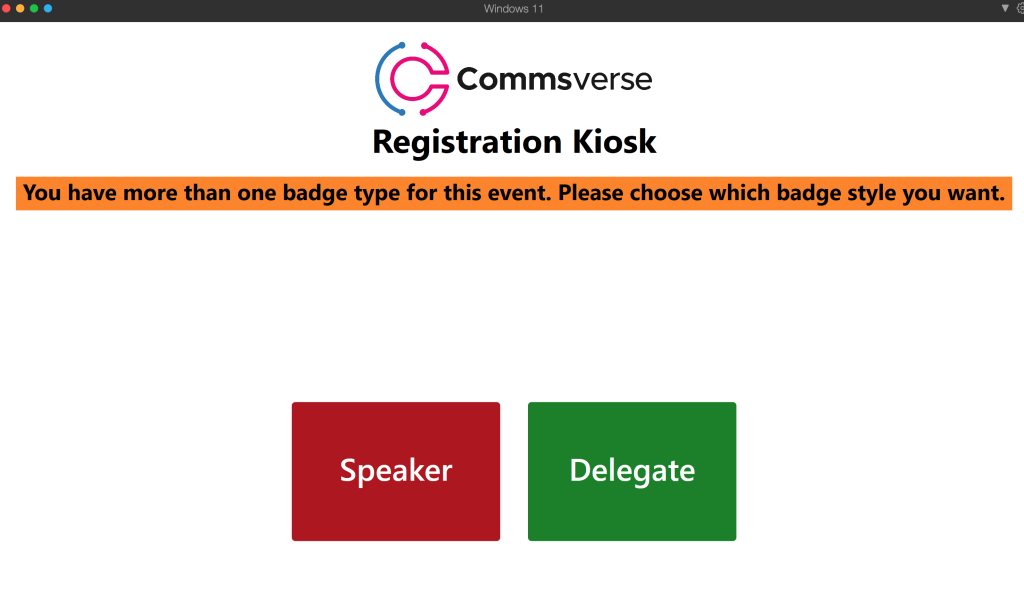
If the attendee has multiple roles, e.g. they’re a Speaker and an Exhibitor, they will be prompted with a choice. This is the only time the attendee must touch the kiosk.
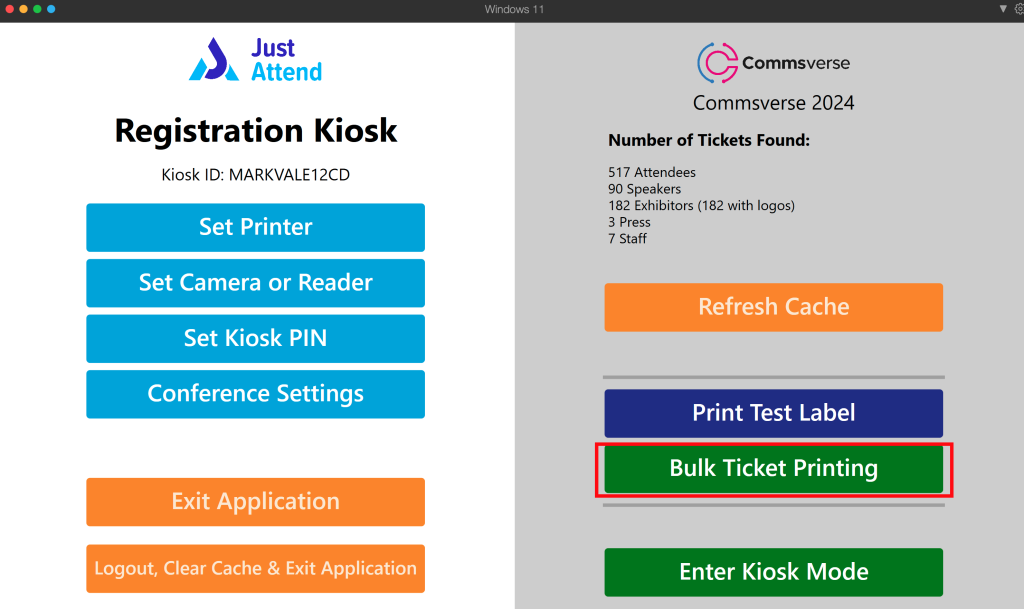
You as the organizer can print badges in bulk using the kiosk. This is useful if you want to pre-print your exhibitor or speaker badges and hand them out manually.
In the kiosk admin area, choose bulk ticket printing.
Here, you can choose which tickets to filter your bulk printing on as well as the roles within those tickets
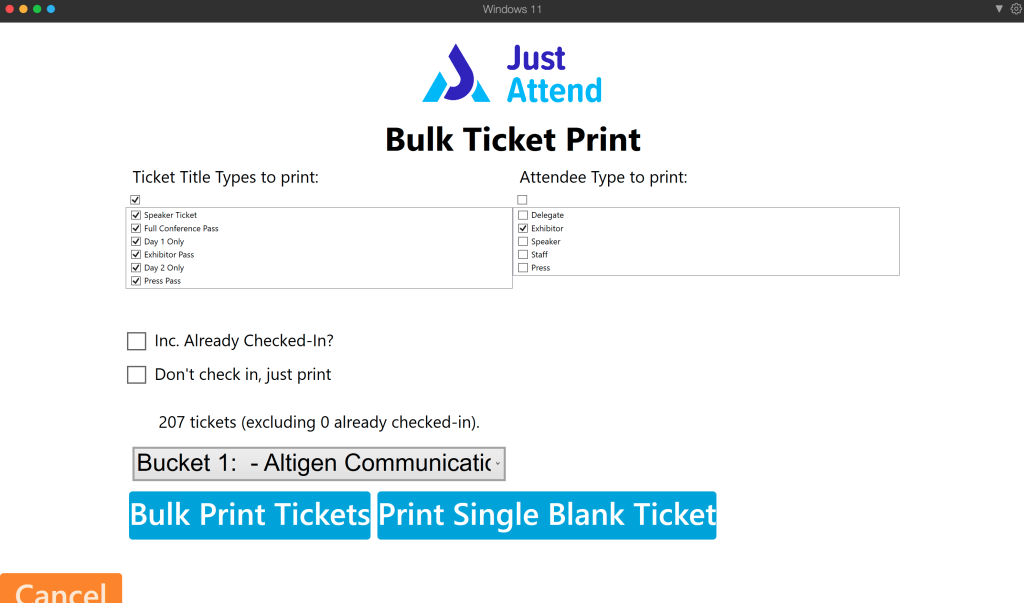
If bulk printing exhibitors, the kiosk will order the badges by exhibitor name rather than person name to ensure that the badges printed are specifically for the same exhibitor. This reduces the effort in sorting the badges later.
The kiosk splits the results into buckets of 10 tickets. This is to minimize wastage due to error.
You can also choose whether you want to just print badges, or print and check them into your event at the same time.
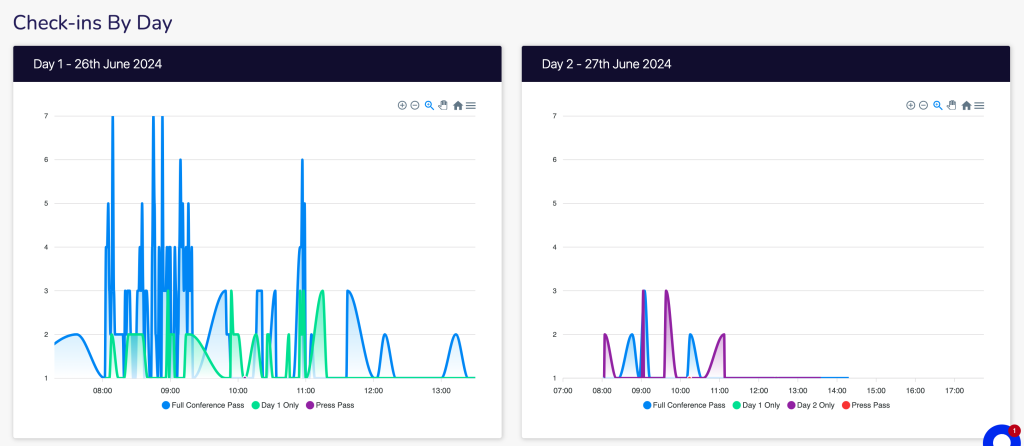
You also get access to comprehensive real time reports on your check-in performance in the event admin area of the platform.
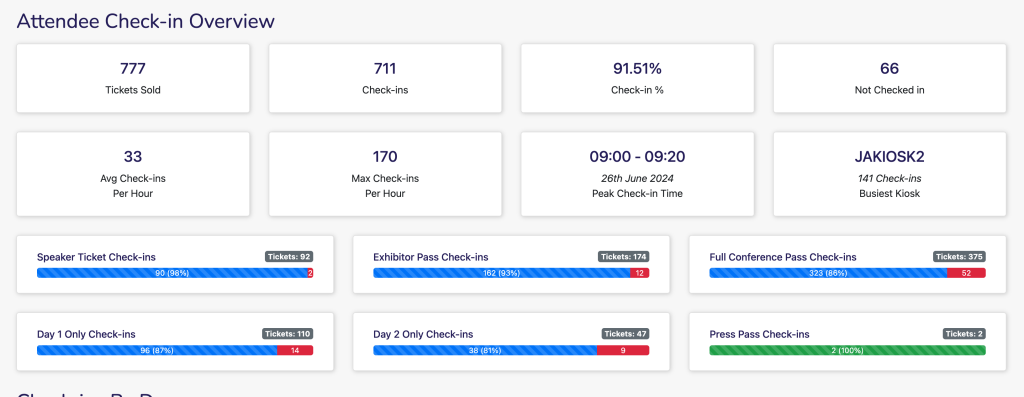
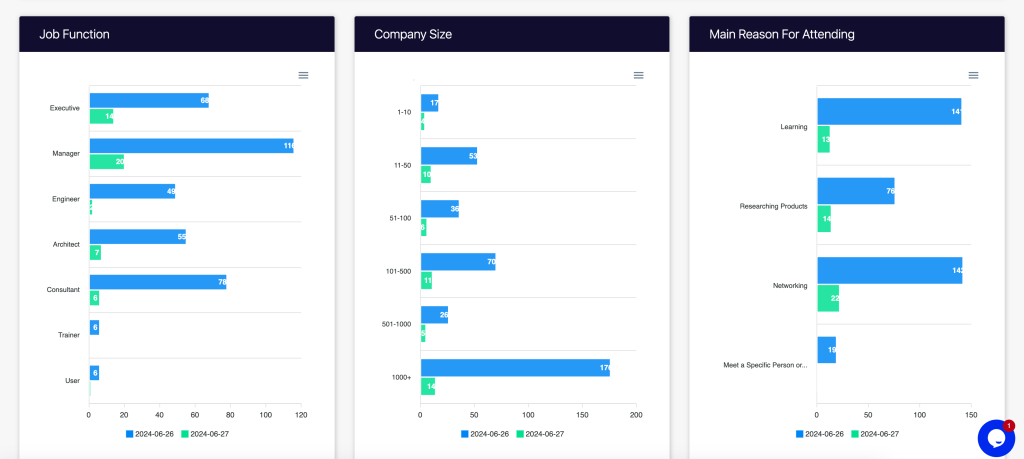
Keep track of your attendance by ticket, instantly see how many people have arrived vs sold tickets and even drill down into the types of attendee, who have arrived based on your registration data.
We also offer:
Implementing Just Attend’s event badge printing software streamlines your event’s check-in process, saving time and ensuring accuracy. Affordable and reliable, this solution suits events of all sizes. For complete peace of mind, consider our assisted or fully managed services.
Ready to elevate your event check-in experience? Contact us today to learn more!
Unique Attendees
Sessions Delivered
Exhibitor Leads Generated
Badges
Printed