
This guide will walk you through how to set up your event badge printer when using our label media. If you’re using another supplier or non-standard labels, your settings may be different.
Epson TM-C3500
Use these settings if you’re using an Epson TM-C3500 color inkjet printer
Please make sure that you have the latest print driver installed from Epson.
96.5 x 274mm adhesive backed event badge labels
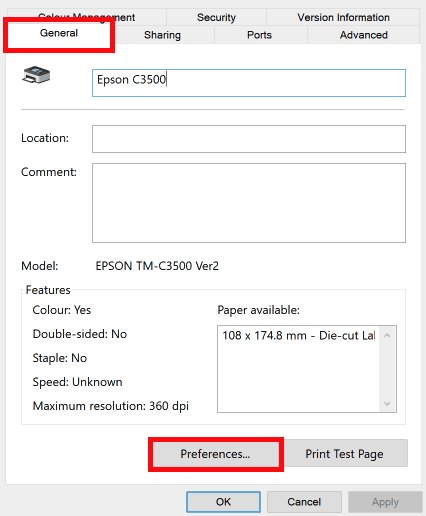
On your Windows Kiosk, click on Windows Start Button and type in “Printer Settings”. Select your printer and click on Printer Preferences
In the paper Media Name, select Custom Settings

Set the width to 95.3mm and the height to 274.3mm. This is slightly narrower and longer than the badge label size to account for the printable area and a small gap for the printer to cut off the label between labels on the roll.
In the Media Form settings make sure this is set to Die-Cut Label (Gap).
The Settings For Paper Handling After Print should be set to Auto Cut (After Every Page)
Press Save
We recommend saving these settings as a new favorite to avoid the print driver losing its settings over time.
96 x 268mm non-adhesive backed event badge labels
On your Windows Kiosk, click on Windows Start Button and type in “Printer Settings”. Select your printer and click on Printer Preferences
In the paper Media Name, select Custom Settings
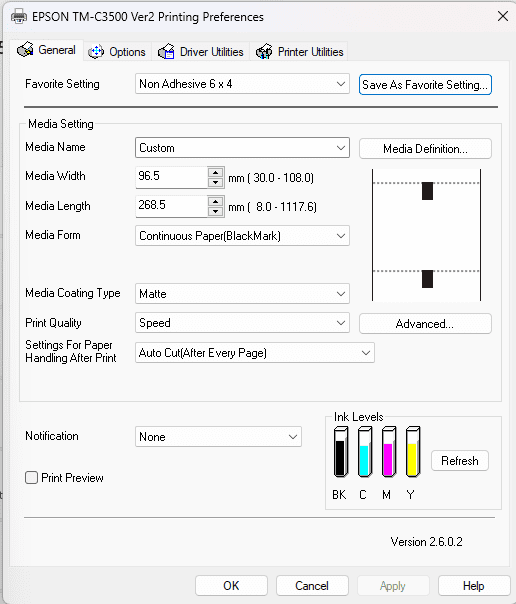
Set the width to 96.5mm and the height to 268.5mm.
In the Media Form settings make sure this is set to Continuous Paper (BlackMark).
The Settings For Paper Handling After Print should be set to Auto Cut (After Every Page)
Press Save
We recommend saving these settings as a new favorite to avoid the print driver losing its settings over time.