Using automations in Just Attend you can send your registration data to your email marketing software such as Brevo (SendInBlue), MailChimp, Constant Contact, and so on. This is useful to create marketing email automations that help promote and onboard your attendees at your event.
This guide will walk you through how to setup and add your registered attendees to your Brevo marketing list.
To do this you will need:
- An account with make.com (free tier)
- An API Key from Brevo
- 10-minutes of your time to setup
Preparing Brevo
Before you begin, create your marketing list in Brevo for your event and include the list fields you need. Just Attend will send the following data fields:
- First Name
- Last Name
- Email Address
- Company Name (if exists)
- Job Title (if exists)
- Name of ticket purchased
- Ticket number issued
- Date and time of the purchase
- The purchased amount
- The purchased currency
Below is a sample payload of information sent from Just Attend.
[
    {
        "user_id": "223",
        "first_name": "MARK",
        "last_name": "VALE",
        "email": "[email protected]",
        "company": "Events Ltd",
        "job_title": "Chief",
        "registration_data": {
            "ticket_number": "77981188",
            "registration_date": "2025-03-11 09:55:17",
            "ticket_name": "Attendee Ticket",
            "ticket_cost": "0.00",
            "ticket_currency": "GBP"
        }
    }
]
Please note that the registration date is recorded in UTC time.
Login to Brevo.com and create your field attributes. To do this, expand Contacts then click on Settings and then select Contact Attributes
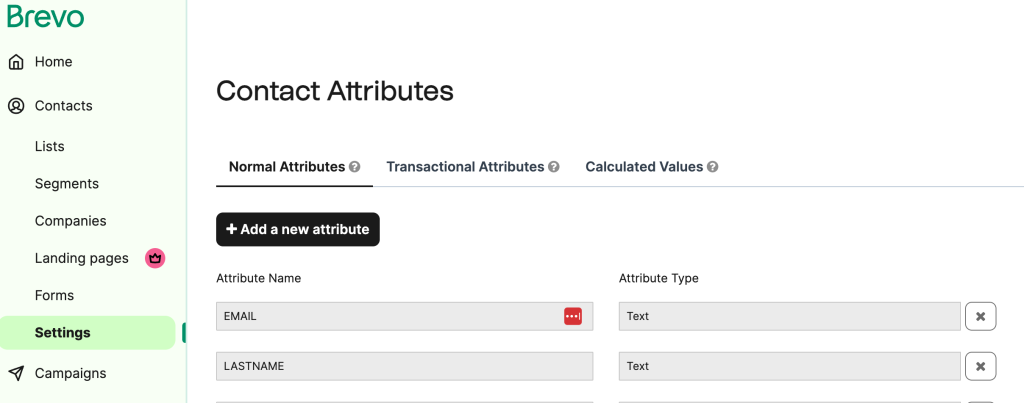
Add a new attribute for each of the fields you want to save from the data we will send.
Now create your mail list. Click on Lists from under the Contacts menu and then click the Create a List button.

Once you have created your list, add the attributes you want to see in the list for your own visual benefits by customizing the columns for you viewing pleasure.
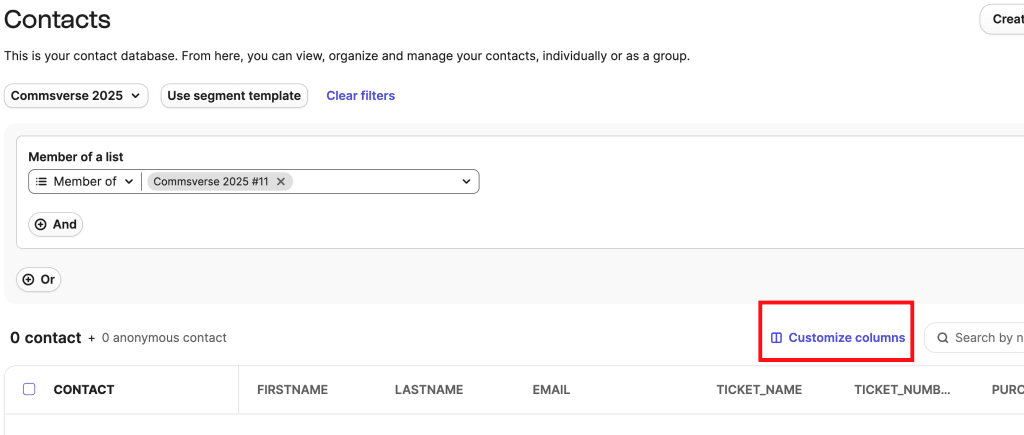
Now, generate your Brevo API key. You can do this by clicking on your account name and selecting SMTP & API from the drop down menu

Generate an API key and save it to your desktop.

Setting Up Make.com automation scenario
We use make.com for our automation scenarios because it is really easy to use and you get to use automation modules that are paid modules in other platforms for free.
Everything we demonstrate here can be done using the make.com free plan which gives you 1,000 scenario runs a month.
Once you’ve signed up to Make, it’s time to create your automation scenario. Click on Scenarios and then Create a new Scenario

Now add your first module. This should be Webhooks > Custom Webhook
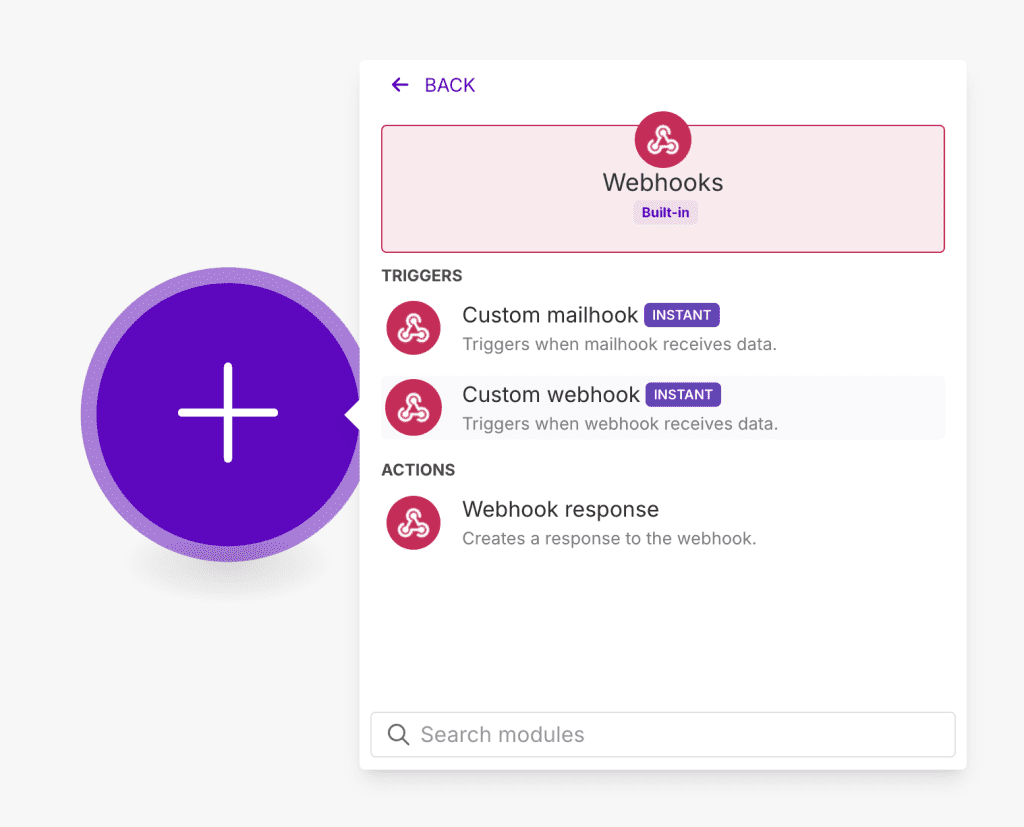
Press Add and give your webhook a name. Copy the URL of the webhook and paste it into notepad or somewhere safe for later.

Now we need to connect the Brevo module. There are two scenarios that we need to account for.
- A contact that already exists
- A new contact
Search for Brevo in the module list and select Update a Contact

If this is your first time using the Brevo module, you’ll be required to enter your Brevo API Key. Paste this in and press Save.

Now Brevo will load all your contact attributes you have in your Brevo account. Press Save. You don’t need to add anything to it yet.
Next we need to add an error handler because if the contact doesn’t exist, it can’t be updated and therefore the scenario will fail at this point. So ensure it doesn’t and move on to the next module, we need to add an ignore handler.
To do this click on the green cog wheel icon in the tool tray and scroll down to ignore
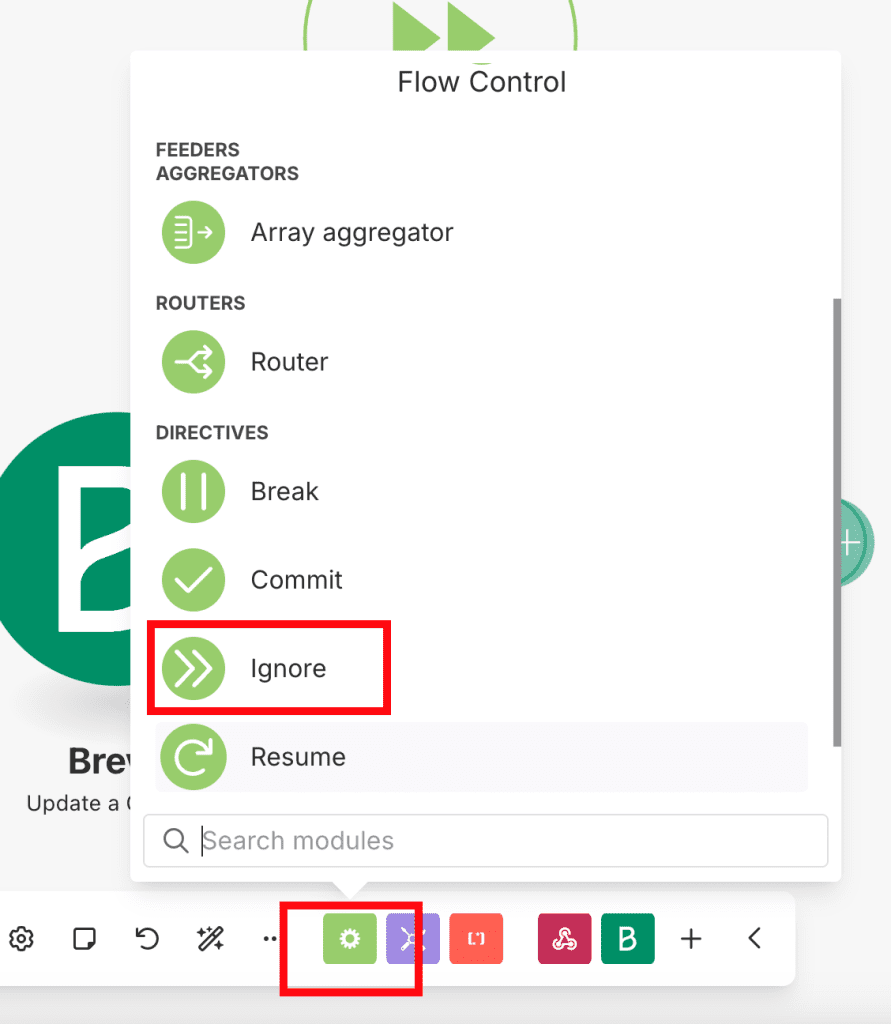
Join the ignore to the Brevo module and then click on the filter. Now we want to tell it to ignore any data errors that may be returned.
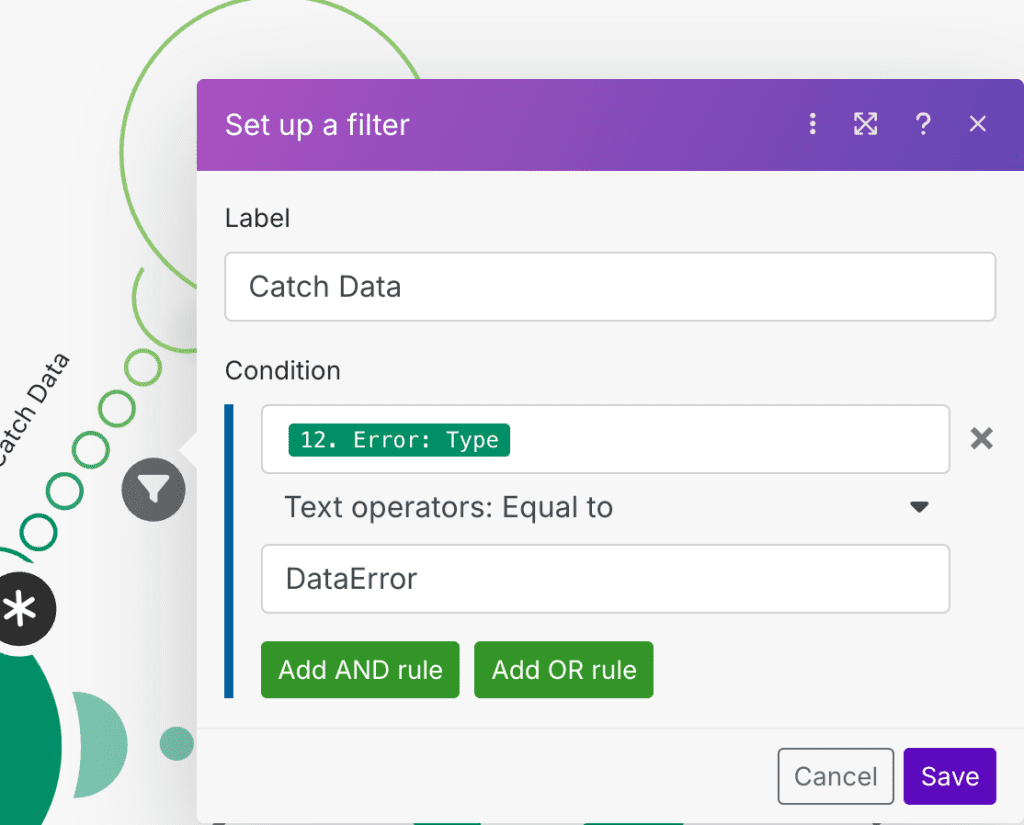
Label the filter as you want, choose the condition ‘Error Type’ from the Brevo module output and then ensure the operator is Equal To and the text we are looking for is DataError.
Now we need to add a new Brevo module and choose Create a Contact. This will create the contact if the contact does not exist already.

Choose the existing API connection and press Save.
Again, we need to add an ignore error handler at the end of this module to account for any problems that might happen. If you don’t and there is a problem, Make will disable the automated processing of scenarios until it is fixed. Use the same settings and filter for the ignore as before.
Now Save your scenario. We aren’t done here yet, we now need to send some data to your make webhook so we can manipulate the data and send it into Brevo.
To do this, press Run Once on your scenario. This will make it listen to receive data

Now we need to set up Just Attend automation
Setting up Just Attend automation
Log in to your event admin portal and navigate to Automations > Add Automation
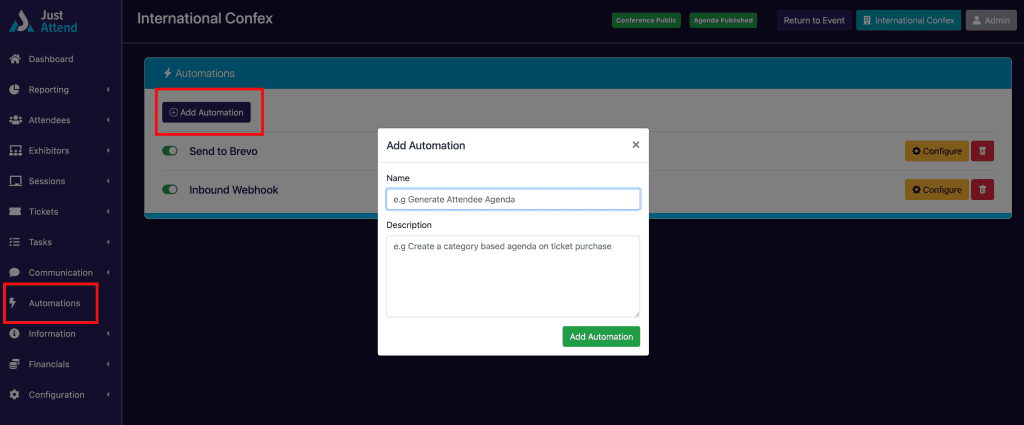
Give your automation a name e.g. “Add to Brevo”
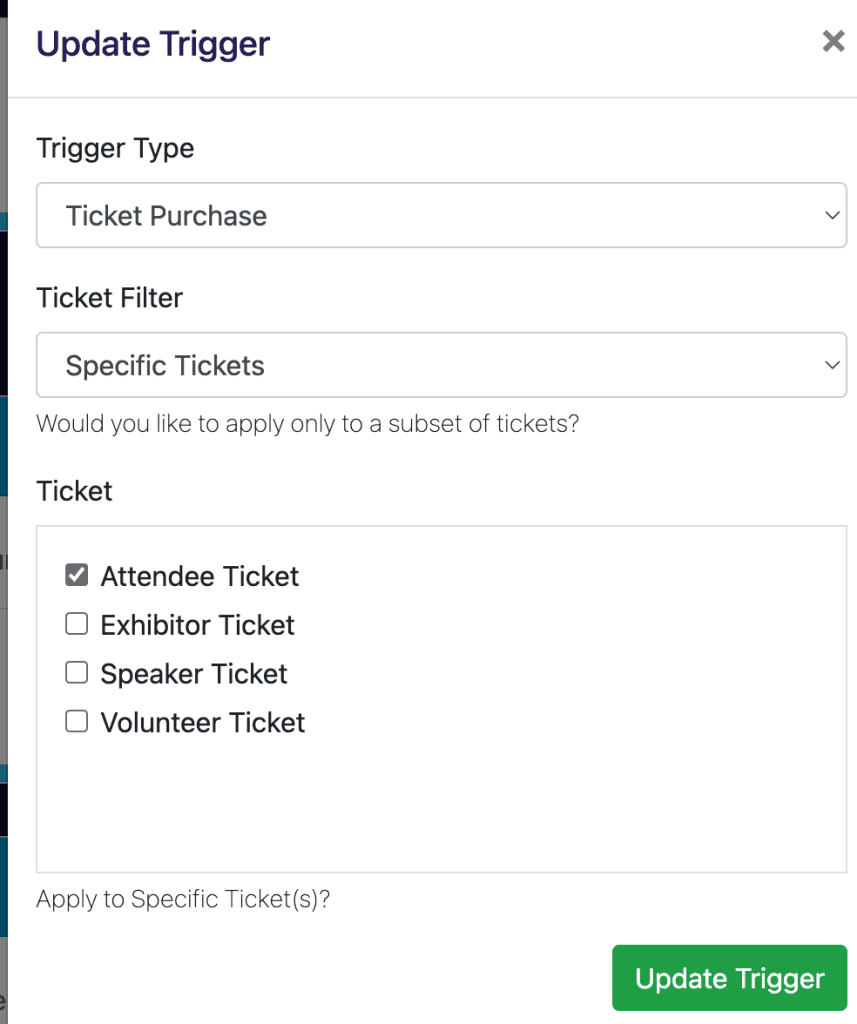
Add a new trigger to set off the automation, select ticket purchase and select all tickets or select the tickets you want to trigger the automation on
Now add an Action and choose the “Send to Webhook” action. Paste the webhook url from your make.com scenario and change the method to POST.

Now enable the automation rule.
Test & prepare your automation
Now we need to send a registration from Just Attend to your make.com webhook so that make understands the shape of the data object it must handle.
You can do this in two ways:
- Use the ‘Send Test’ button on the automation – this will send the last registration record as found in your event
- Register for a ticket on the front end using a test account
Once you have sent a test automation from Just Attend to make.com, temporarily disable the automation rule until the next steps are complete.
Go back to your make.com scenario
You should see a bubble with a 1 next to your webhook. This signifies the webhook has received data. Click on it and you’ll see the bundle received.
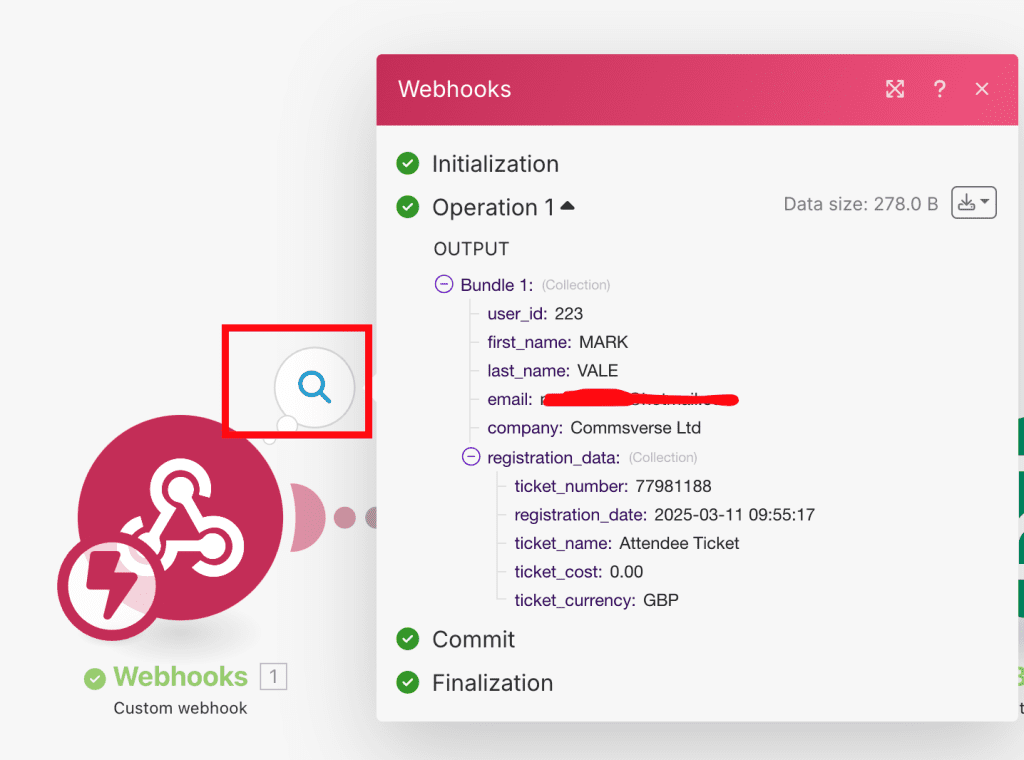
Now Make knows the data, this can be referenced in the Brevo modules.
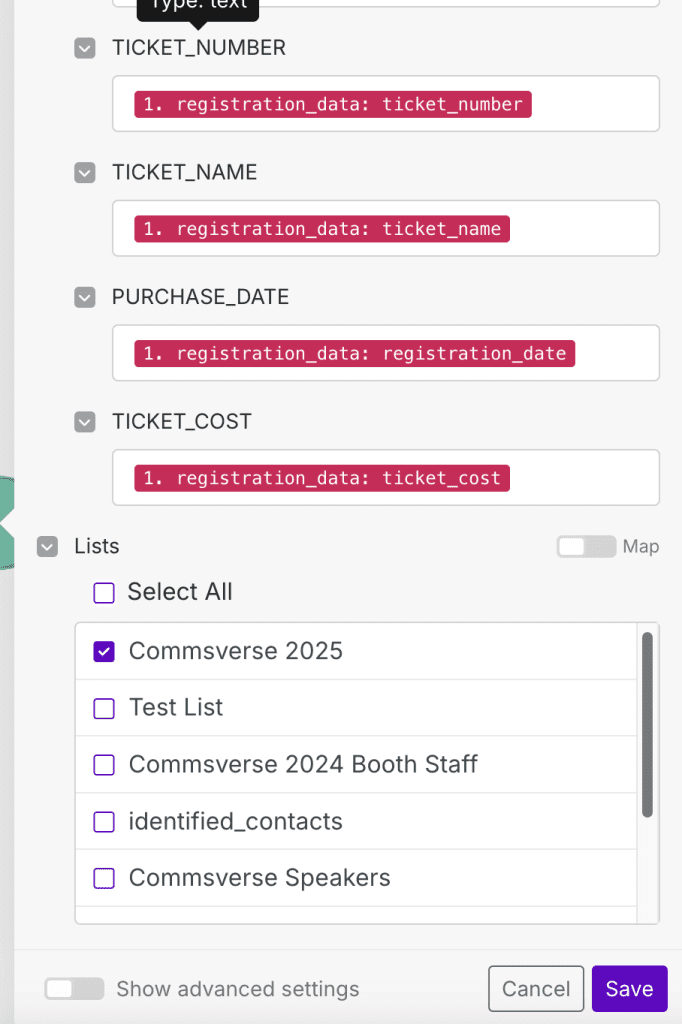
Open the Brevo module and in the user attribute fields, select the data objects from the webhook output against each of the brevo fields you want to add them to.
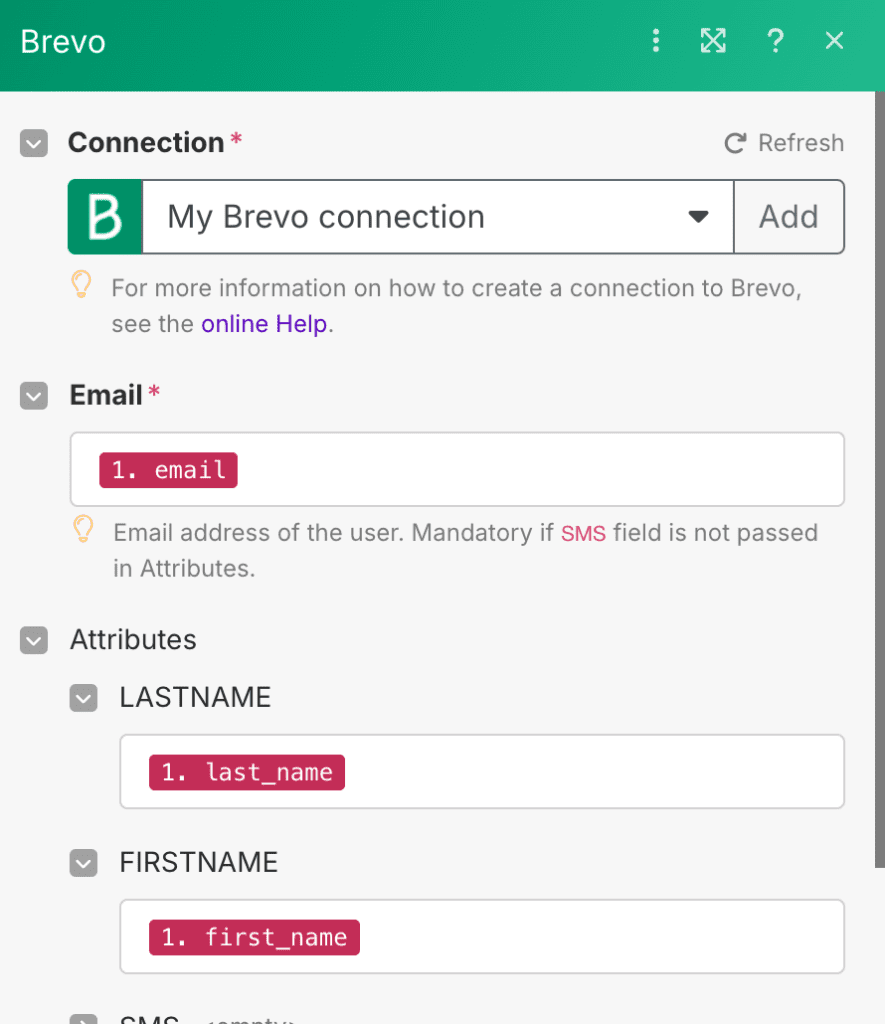
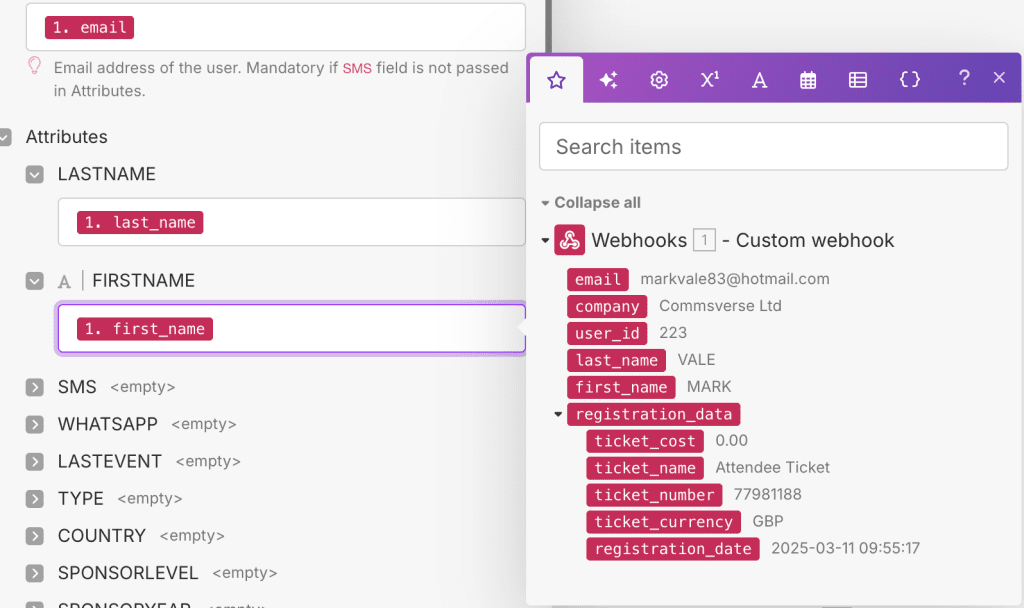
Be sure to select which marketing lists to add them to
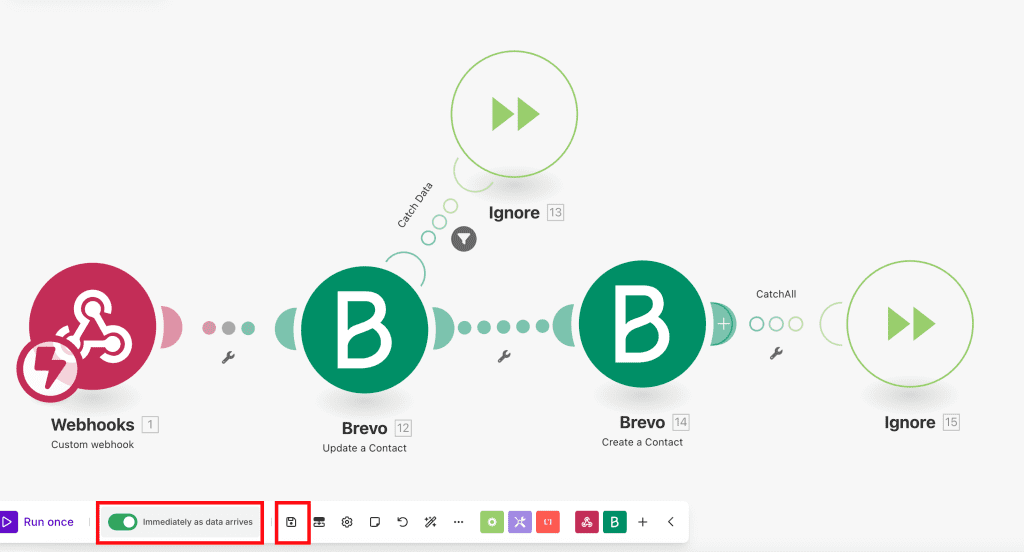
Your scenario should look like the below. Save your scenario and turn on instant activation
Now go back to Just Attend and re-enable your automation and watch the magic happen!


