If you’re using another registration platform but using Just Attend to manage other elements of your event like badge printing, you’ll need to import your registrations into our platform.
In this article we will explain how you can do this using our attendee import feature.
Before you begin
For our system to recognise your attendees they must have two things, a platform level user account and a ticket registration for your event on Just Attend. The import feature will create both of these for you, so you don’t need to worry.
However, in order to import your attendees you must ensure that you have the following data which is required by our system.
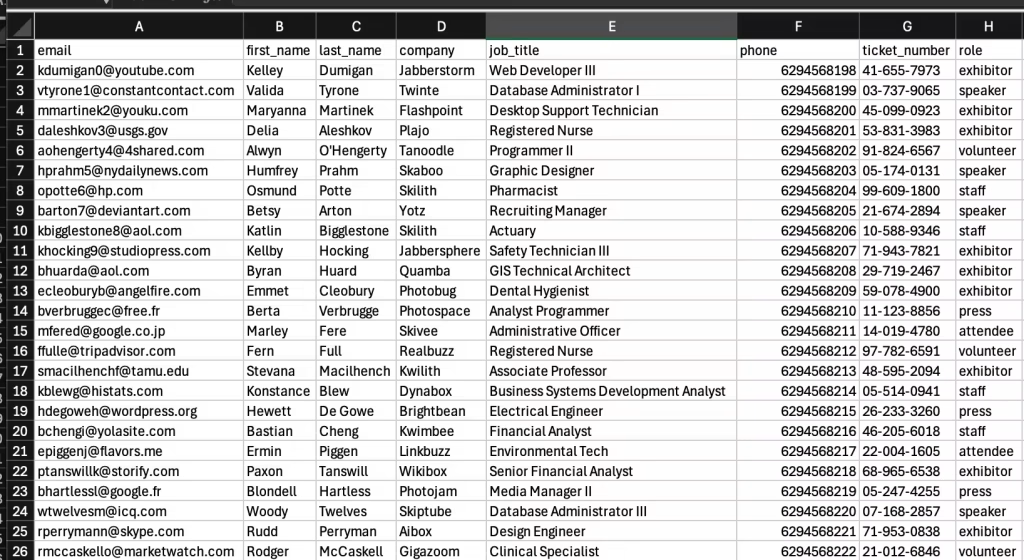
- E-mail address of the registered attendee
- First name (as a dedicated field)
- Last name (as a dedicated field)
Optionally you can also supply the following data to enrich the capabilities and identification of attendees, especially if you’re using our badge printing software.
- Job Title
- Company Name
- Ticket Number
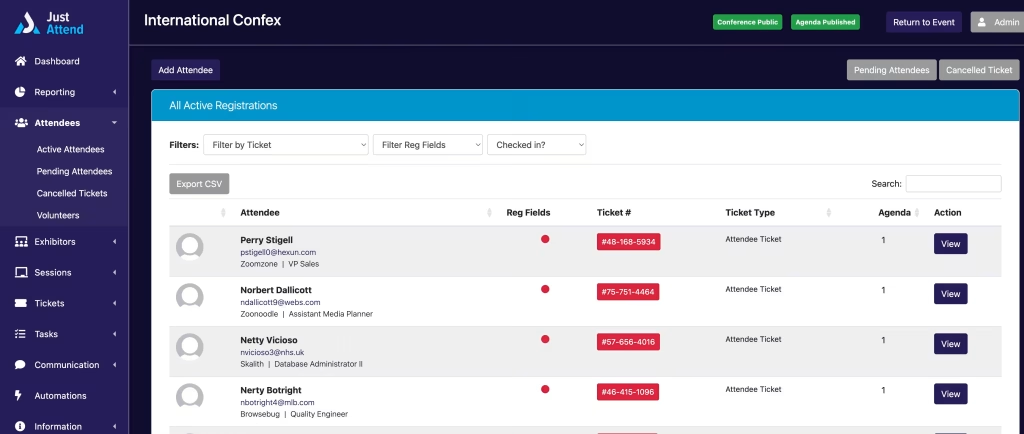
- Attendee role – this can be one of the following (“Attendee”, “Speaker”, “Exhibitor”, “Volunteer”, “Staff”, “Press”)
Understanding the importance of attendee role
The attendee role allows you to differentiate your attendees between each role. When using badge printing you can print differently designed badges for each so they’re more easily identified at your event.
If the role is not declared when registering the attendee, they will be assigned the role associated to the ticket you import them against. The default role is attendee.
Understanding the ticket number
The ticket number is important especially when using our platform as your event badge printing solution. If you’re using another registration platform it is likely this ticket number will be generated for you on that system.
Our system will need to know what that ticket number is for our badge printing software to recognize your attendee’s ticket when they scan it at check-in.
Our badge printing kiosks will recognize ticket numbers both numeric and alphanumeric in their construction (e.g. “123456” or “A-1345-C-YT6”). These can be plain text entry or encoded into bar and 2D QR codes.
It is important that the ticket number on our platform matches that issued to your attendee via your registration platform. If these do not match, the attendee will not be able to check-in using zero touch scanning and must search for their badge using their email address or phone number.
If your registration system doesn’t issue ticket numbers then our system will generate them for you when you bulk register your attendees against an event.
When doing so our system will email the attendee with their ticket number and QR code which they can then use to scan and print their badge using the self-service check-in kiosks.
Prepare your event tickets
You’ll need to create your event tickets in our platform before you’re able to import registrations. We recommend that you mimic the tickets you’re offering on your registration platform especially if you plan to print the ticket name or have different access times such as per day or hourly based ticket validity.
Preparing your registrations for import
The first step is to export your registrations from your registration platform to CSV or spreadsheet format. Please follow the supplied guides on how to do this from your registration provider.
Next, you need to prepare the CSV into the format that our system supports. You can download our CSV template here.
Ensure that the CSV columns are not reordered. They must appear in the order as supplied in the template.
Save your registrations as a CSV file, not as an XLSX or another format.
Importing your attendees
Now it is time to import your attendees to the system. This is a two step process. The first is to import the attendees as contacts and then registering them for your event.
Step 1: Log in to our event platform. When logged in, click on My Account and then select the Organizations tab
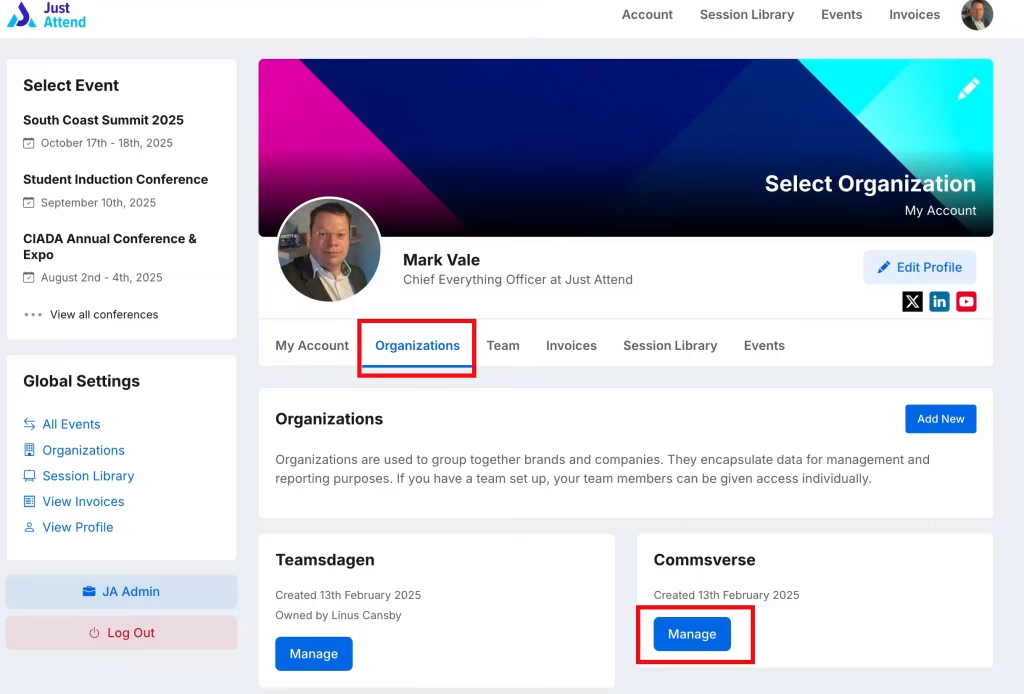
From there click on Manage
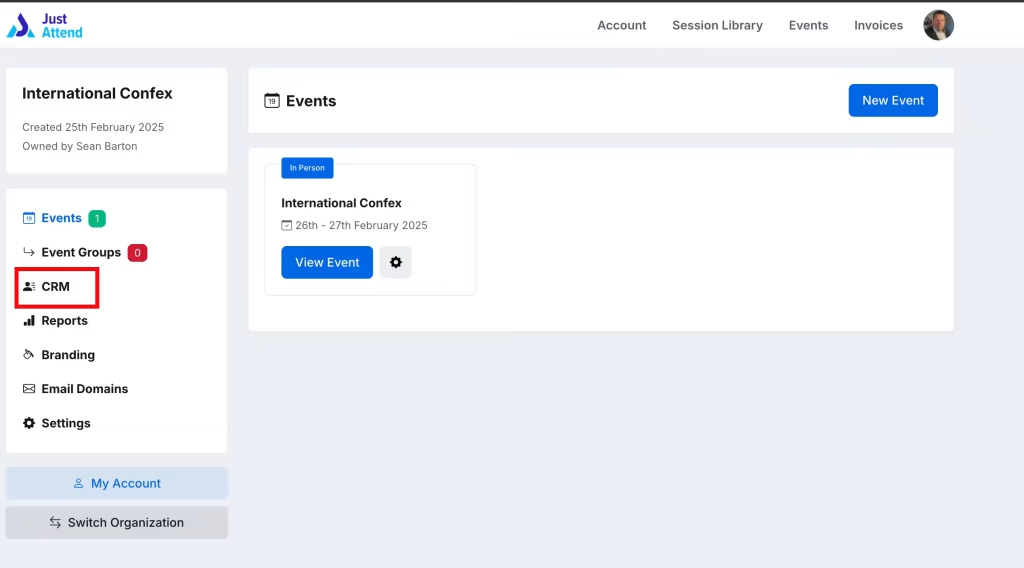
Step 2: Upload and import your registrations. To do this, click on the CRM link
Then click on Upload CSV
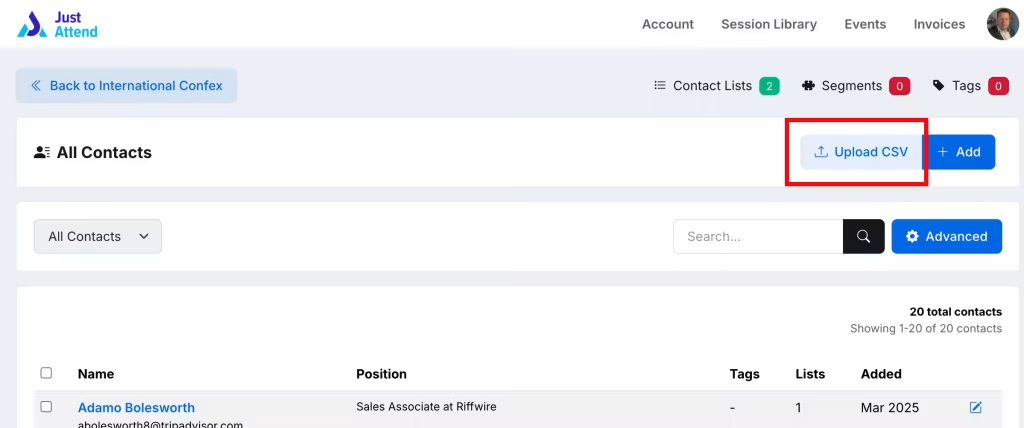
Drag and drop your saved CSV import file into the uploader or click browse and upload
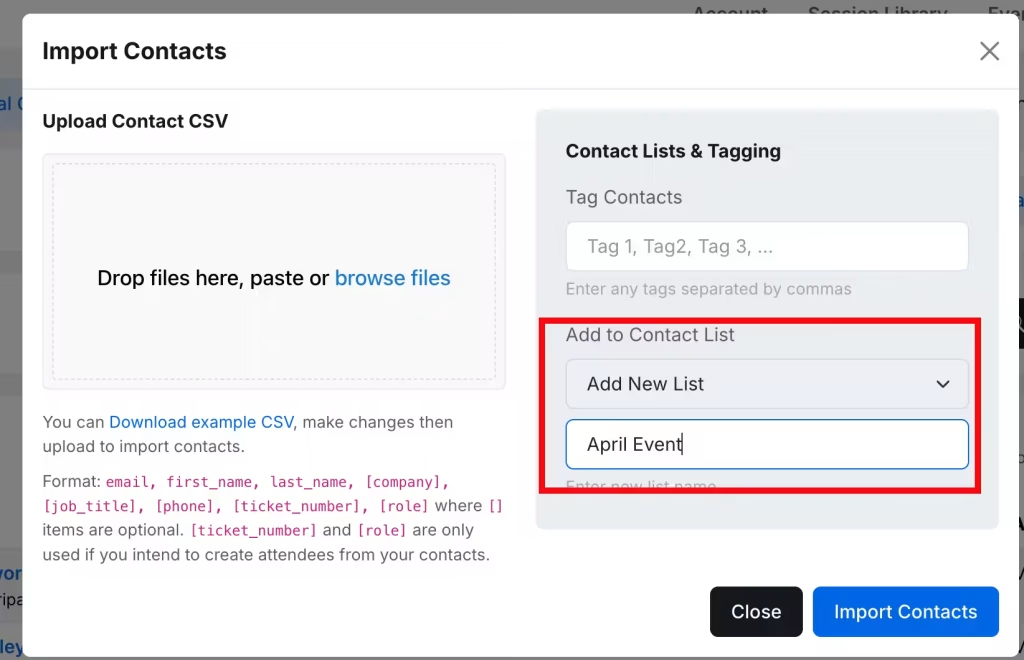
If this is your first import, we recommend to create a new contact list at this point before importing to save time. Name the contact list as you require, perhaps calling it something that relates to your event.
Important Consideration: If you have multiple tickets for the event and using the ticket name on the badge print or have access restrictions such as morning and afternoon entry, then only import attendees assigned to that ticket type in the same import. Create a contact list for each ticket type and add the attendees to the appropriate list.
Now click Import Contacts
Now your contacts are imported, it is time to register them for the event.
How to register multiple attendees for an event
To import attendees into your event and register them, click on the contact list menu link
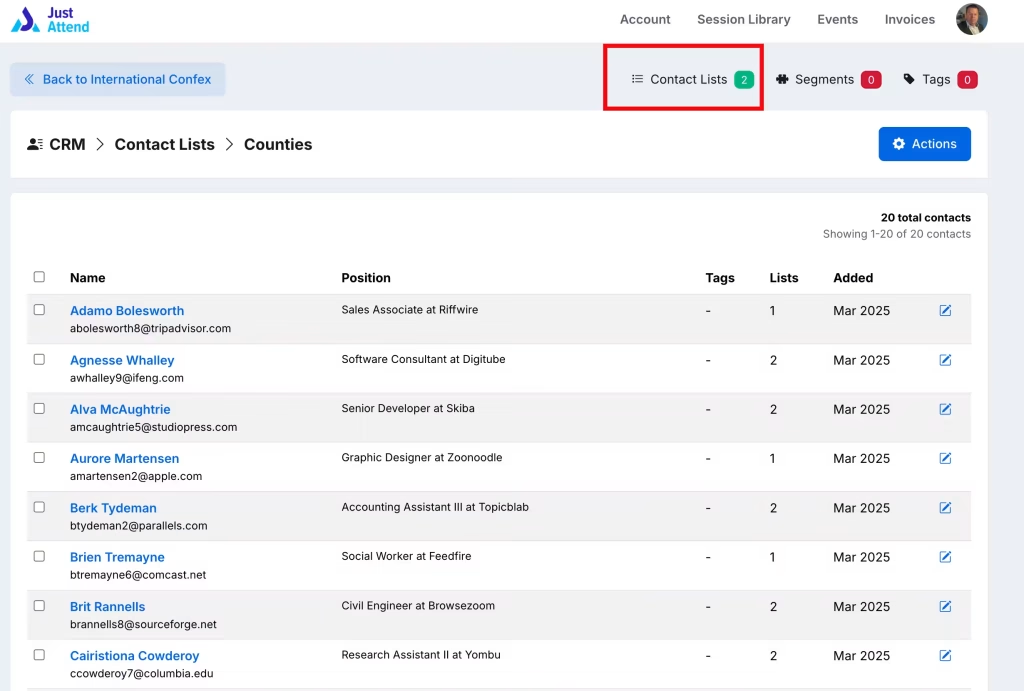
From there, select the contact list you added your attendees to
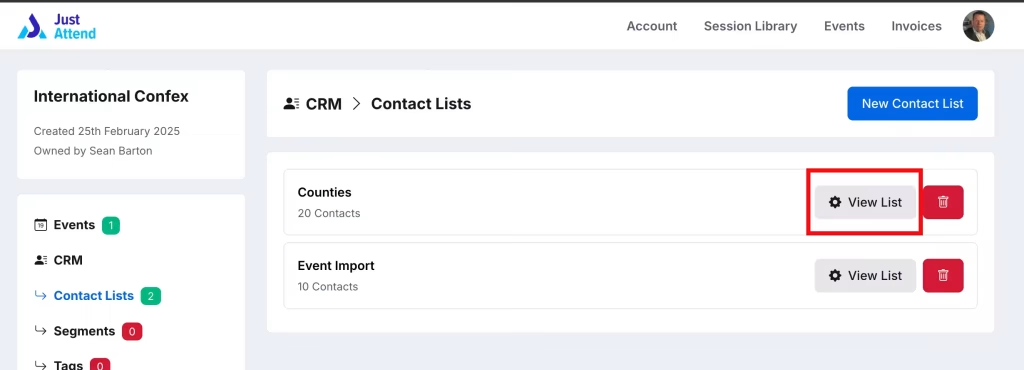
Inside the contact list, click on Actions and then Register for Event
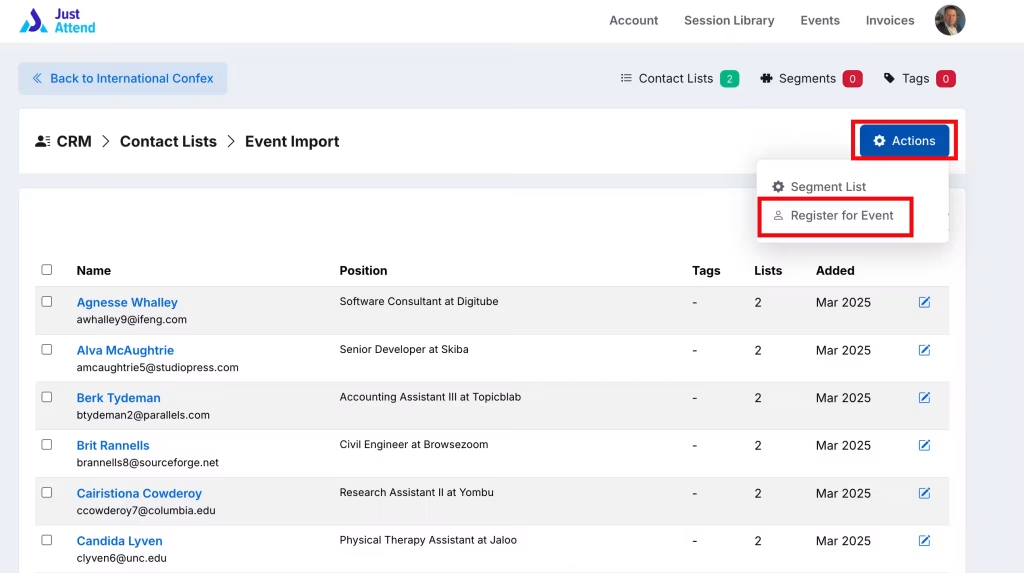
You don’t need to select the attendees in the list. Register for event function will register all contacts found in this list for the selected event regardless of whether you’ve pre-selected or not.
From the modal popup, select the event you want to register the attendees for, then the ticket you want to assign them. Choose whether to send them the ticket email confirmation or not.
If you’ve already sent them a ticket confirmation with their ticket number on your registration system, set this to No.
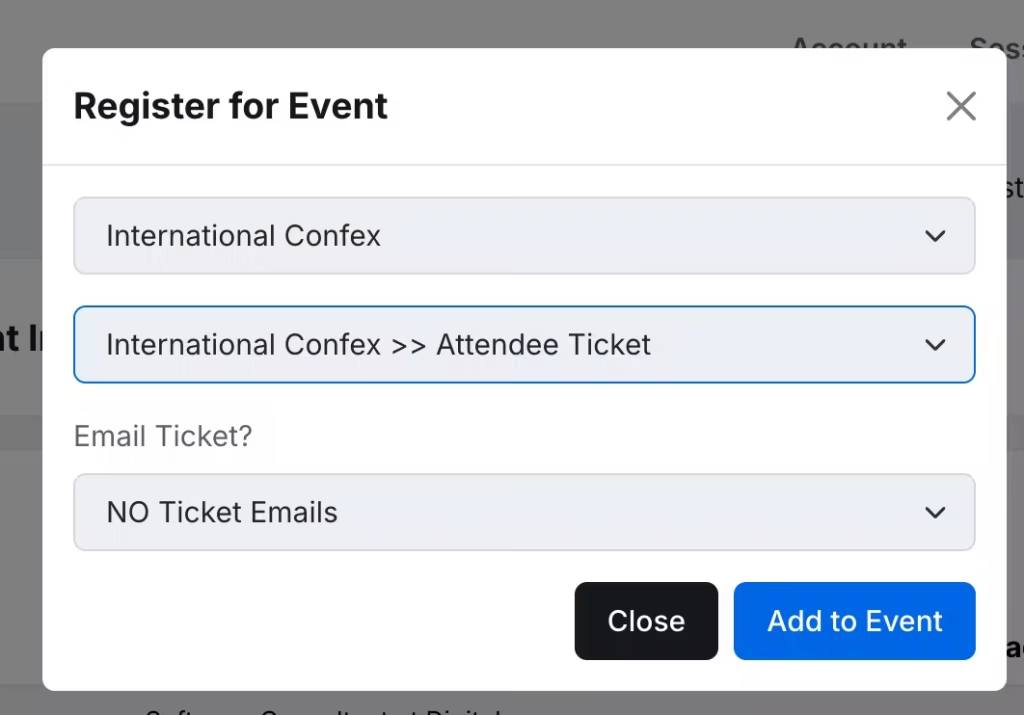
Press Add to Event
Now your attendees have been registered for your event and you’re ready to use them in the system.