If you want to offer your attendee the opportunity to pay for their ticket by bank transfer, you can enable the ‘pay by invoice’ payment method in Just Attend.
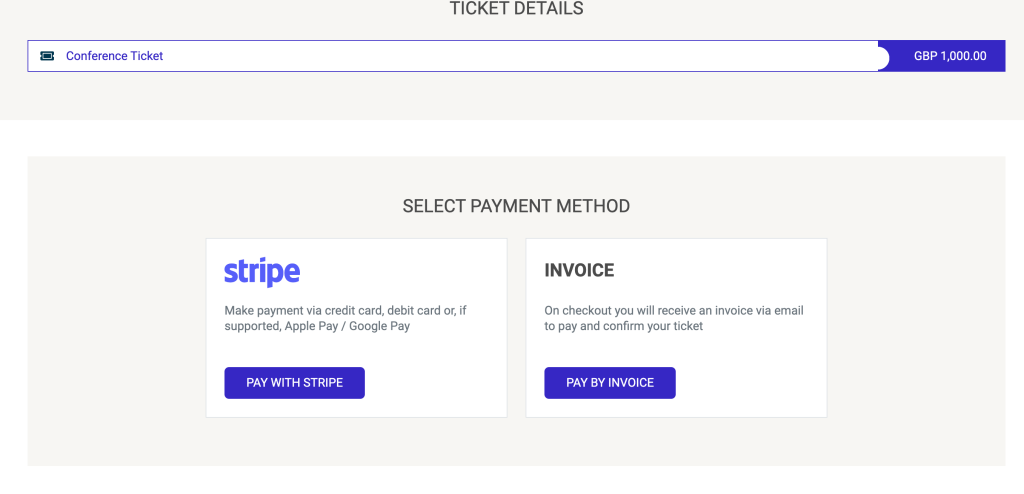
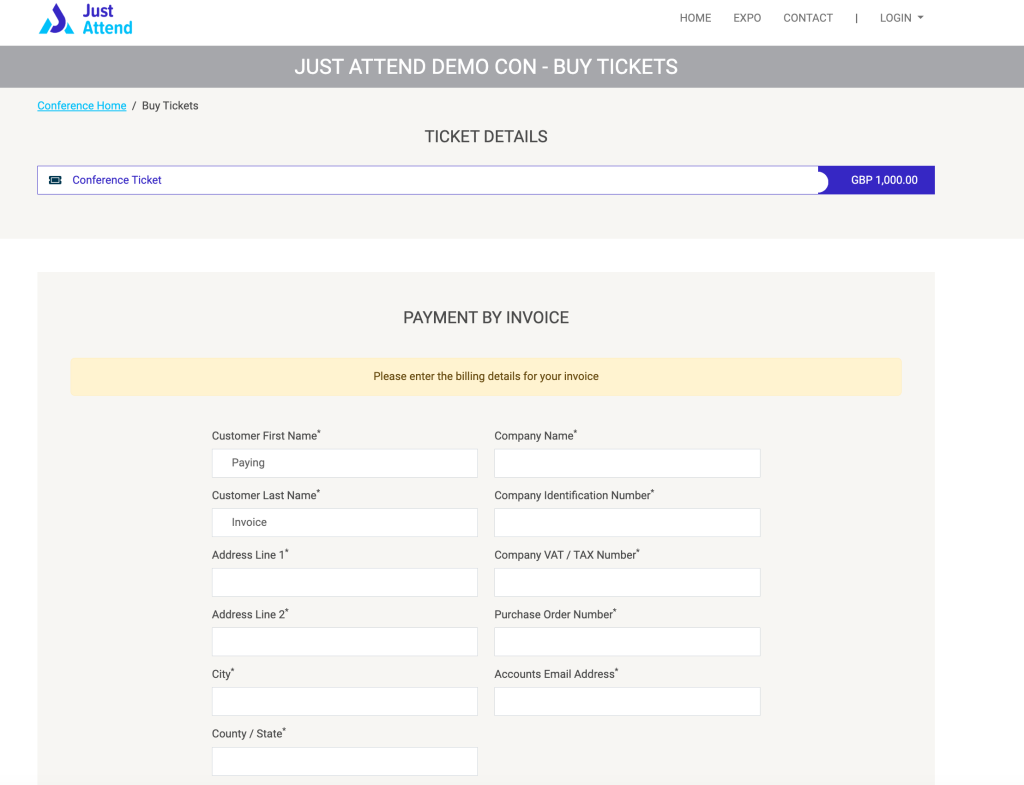
When enabled, the purchaser will have the option to choose what method of payment they want to pay with. If they choose pay by invoice they will be required to fill out billing fields such as name, address, PO number etc. You can choose which fields to require in the pay by invoice module configuration.
Once they have completed their billing information and completed their ticket registration they will be sent the invoice to their email address (and accounts email address if supplied) along with their ticket to the event.
Be aware that the ticket is issued at the point of order and not when you receive payment. There is no integration with your bank to reconcile invoices currently. For any unpaid invoices, you will need to cancel the attendee’s ticket.
Setting Up Pay By Invoice
Login to your conference admin portal and navigate to Setup > Payment Methods

Click on Manage next to the invoice method.
Please ensure you have completed your ticket tax settings before enabling the invoice payment method. For more details, see ticket tax settings.
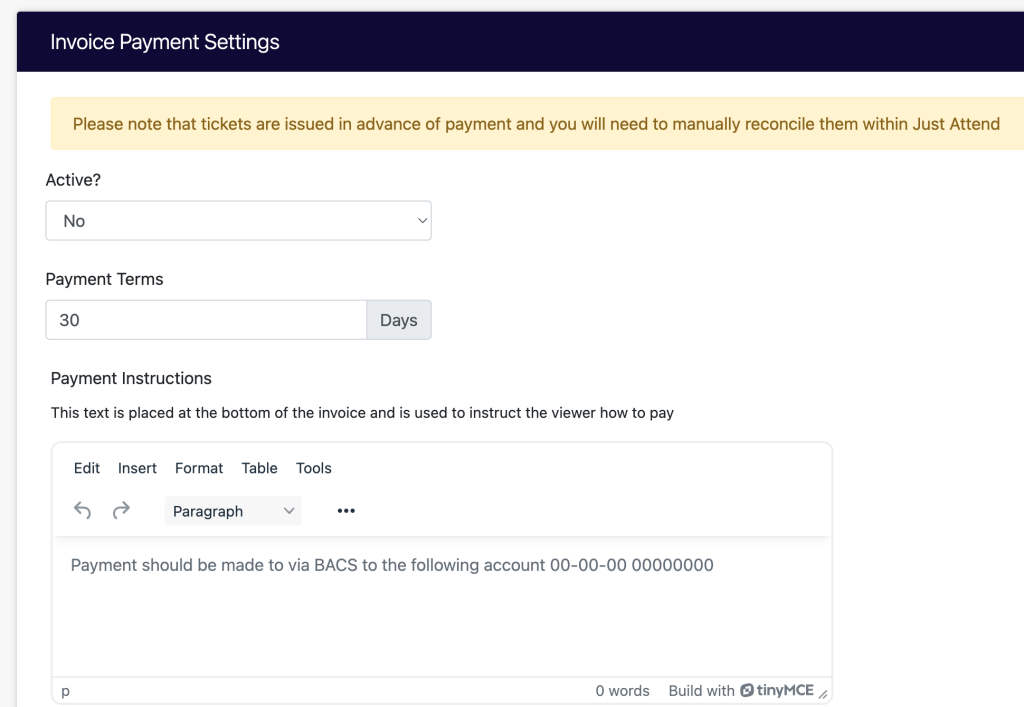
- Payment Terms – the number of days the invoice must be paid by
- Payment Instructions – please enter your bank details or other instructions on how to pay this invoice.
The next section contains the billing information you want the purchaser to add to the invoice. By default they are all set to ON and required.
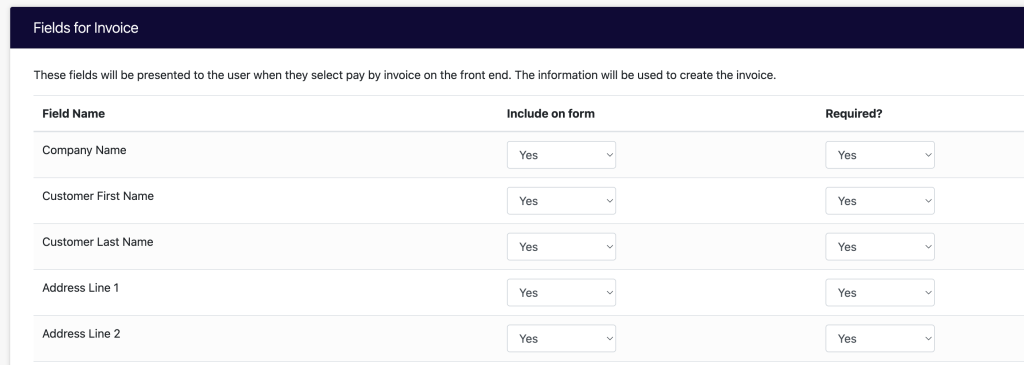
Please adjust the field settings as you require, then Press Save.
When you’re ready to enable the method, change the status from Inactive to Active and press Save.
View Pending Invoices
You can view any unpaid invoices at any time by navigating to Financials > Pending Invoices in the conference admin portal.

When you receive payment, you can edit the invoice and mark it as paid.
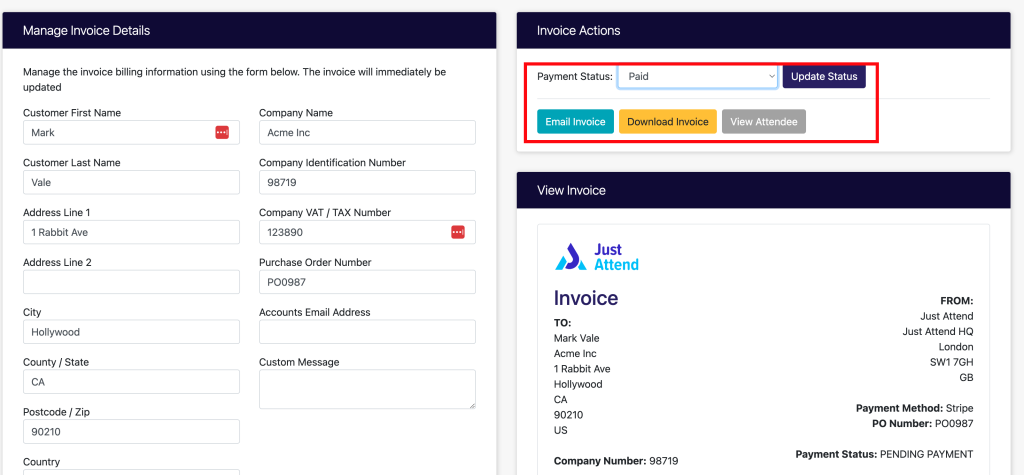
If an attendee needs to edit their invoice billing information, they can do this in their own account profile on the front end. Alternatively, you can make the necessary changes here and send them an updated invoice by email.
When the purchaser adds their accounts email address, the invoice is emailed to the purchaser and the accounts email address at the same time.


