
Just Attend is an all-in-one event platform and we have our own registration solution. Using this with our the rest of our platform makes a seamless event experience for your attendees.
However, should you wish to use an external event registration platform and use our system for things like session scheduling, exhibitor management, or badge printing you can import your attendees in two ways:
- CSV Import
- On registration action via webhook
How does this work?
Using a webhook means that our system will receive your attendee registration data as soon as your registration system has sent it to us. This automates the onboarding and ability for attendees to use our platform without you needing to import your data.
What do you need?
Your registration platform may already support the sending of data to a webhook. If it does great then that is awesome!
However, the data we receive must be in a format that our system can understand and process.
If your registration system doesn’t allow you to construct the webhook payload (message body) then you’ll need to create a low-code / no-code integration using a platform like make.com, zapier, or Microsoft Power Automate.
Choose which integration platform that your registration platform has an integration with. Most have integrations with Zapier.
Using Make.com might be better where your registration platform doesn’t have integration with Zapier or Microsoft Power Automate. This is because Make.com doesn’t charge for webhook or HTTP post actions unlike Microsoft does.
Data structure
Our system will require the data supplied to us in JSON format and with the following payload
{
"first_name": "Joe",
"last_name": "Bloggs",
"email": "[email protected]",
"job_title": "Developer",
"company": "Example Company",
"phone": "+441234567890",
"ticket_id": 13,
"ticket_number": 1234567890,
"send_ticket": false
}| Key | Value | Description |
|---|---|---|
| first_name | Text | Attendee first name (mandatory) |
| last_name | Text | Attendee last name (mandatory) |
| Text | Attendee email (mandatory) | |
| job_title | Text | Attendee job title |
| company | Text | Attendee company name |
| phone | Text | Attendee phone number |
| ticket_id | Number | Ticket ID in the system to register them against |
| ticket_number | Text | ticket number from your registration platform |
| send_ticket | Boolean (true or false) | Set to true if you need the ticket QR code email sending |
If you don’t supply a ticket number, our system will generate one for you. This might be useful if you’re using us for badge printing and want your attendees to scan and check-in quick and easy.
You can get the ticket _id from the tickets section in the event admin portal
Setting up your event to receive an inbound registration
Log in to your event admin area, then navigate to Automations.
Create a new automation, call it whatever you like.
Then create a trigger and choose Inbound Webhook
Copy the Webhook URL that is generated
Set the request type to User Registration
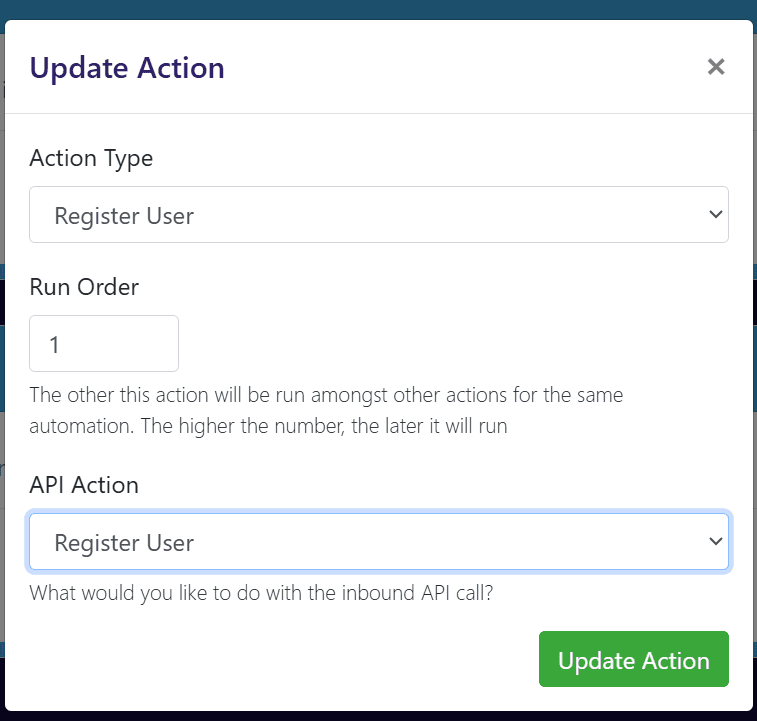
In Actions, create a new action, and select Register User
Finally, enable your automation rule.
That’s it, now you can send your data to the webhook URL and the system will register the user for you.
Example Use Case
You may use a web form on your website to register attendees for your event. Your form application may support sending submitted form data to a webhook URL.
Unfortunately, that data structure will be incompatible with the shape we require, so you need a ‘middleware’ platform that can receive the data, manipulate it into the required format, and send the manipulated version to us.
Make.com is a great tool for this and you can do this on their free plan (rate limits apply).
First, let’s assume that your web form will send this data when someone fills out your registration form.

Head over to make.com and create a new scenario. The first module you’ll need to add is the Webhook module. Give this module and name and save it
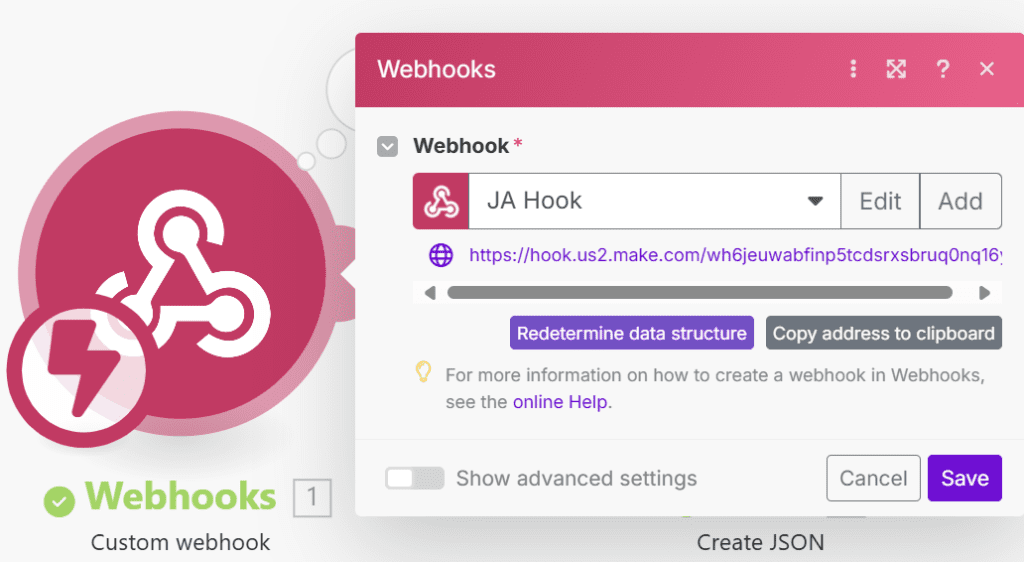
Copy the generated address from the webhook and save it. This is the URL you’ll need to add to your web form actions as the Webhook address to send the submitted form data to.
When make.com receives data from your form it could be in JSON format or form-data. You will need to parse this into a JSON object that matches the format our system is prepared for.
Assuming your web form application sends the daa as JSON, you can add a new JSON module to your make.com scenario.
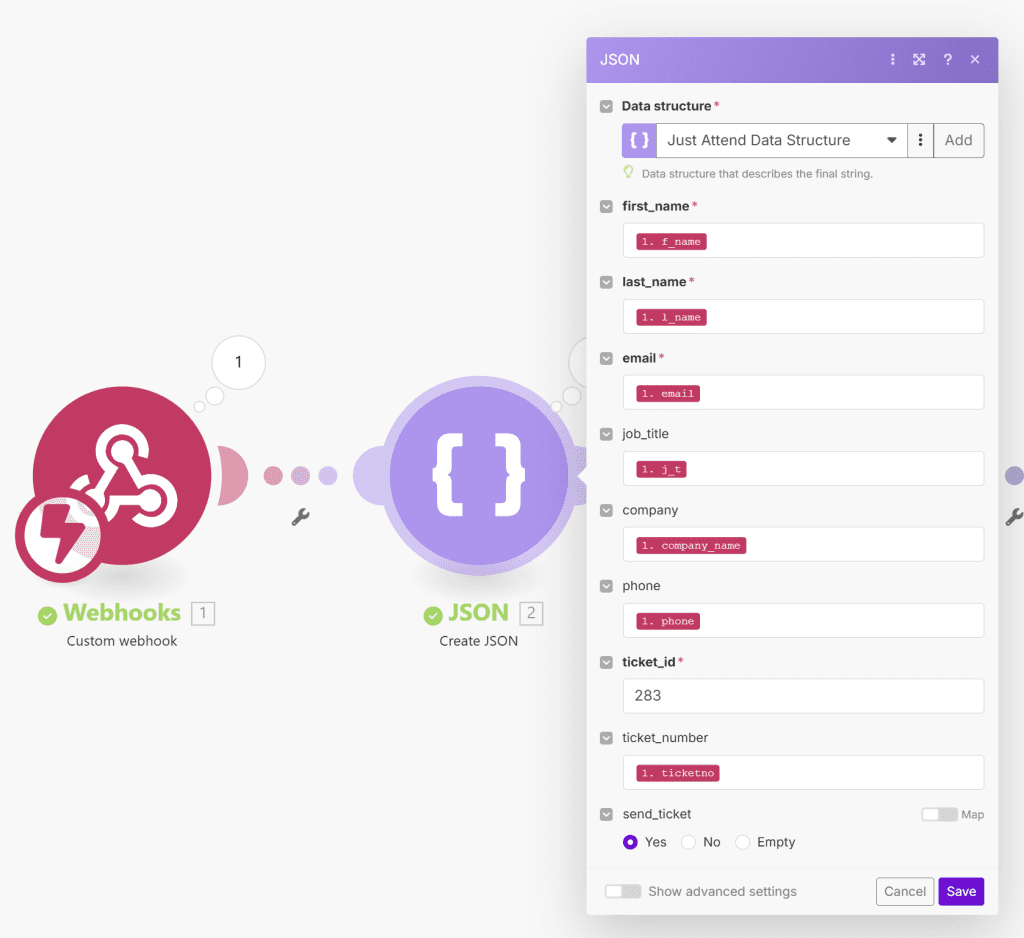
Add each Just Attend key to the object and set it’s value to the parsed data variables received from your webhook and form.
Now add a HTTP module after the JSON object. This is where we are going to send the data
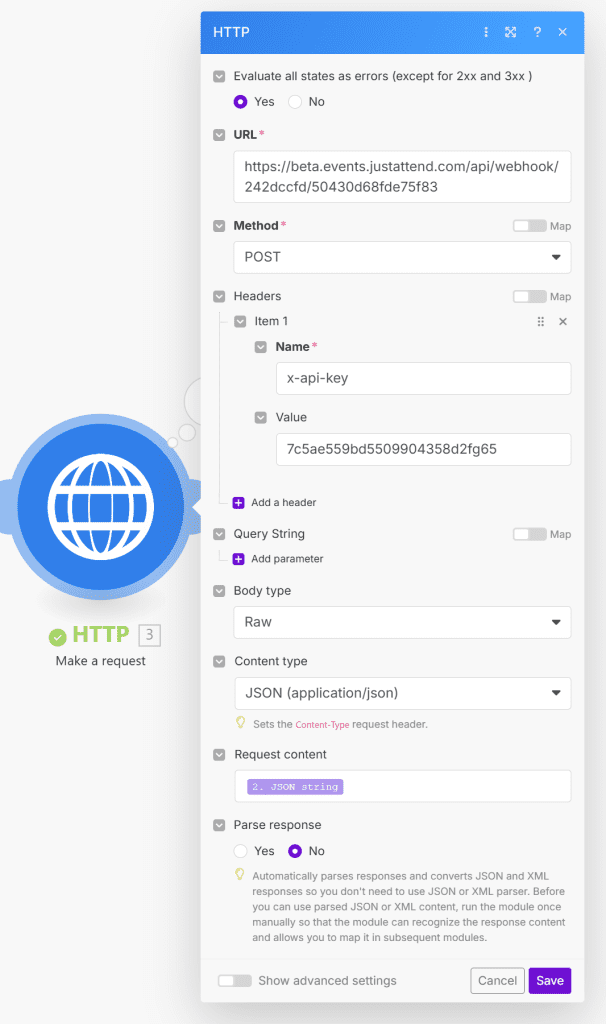
In the URL paste the webhook URL generated in Just Attend. You will need to set a header called ‘x-api-key’ and set its value to your event’s api key found in Configuration > Event Details > API Key
In the body type, select Raw.
In the content-type, select JSON
In the request content, select the JSON object created that matches the format we are expecting and press Save.
The next module is optional, but recommended. We want to let your registration system know we have accepted and processed the submission. We do this by adding another Webhook response module.
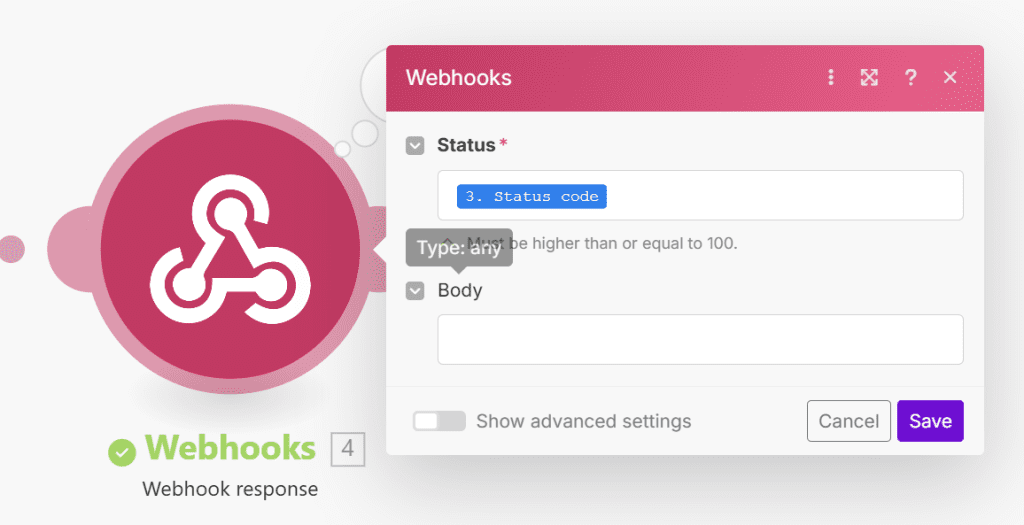
In the status, select the status code that will be issued by our system on receipt of valid data.
Final simplified example will look like this:
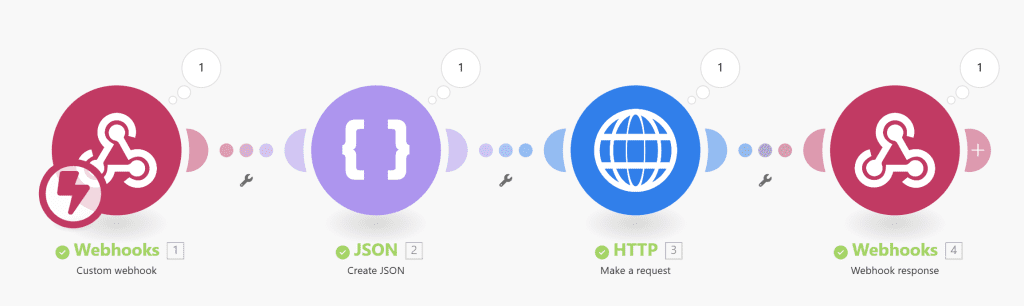
Receive > Manipulate > Send > Respond.