In this article we will show you how you can send your registered attendees to your HubSpot CRM by using automations.
Before you begin you will need to create a free account on make.com.
Make is a process automation platform that can receive data from a sending system (Just Attend) and manipulate it into the format expected from the receiving system (HubSpot).
These systems are also referred to as low-code or no-code automation platforms. Others include Zapier and Microsoft Power Automate.
We use Make because we find it the easiest platform for non-technical users to use and their free plan gives you access to all modules and 1000 process runs a month.
Creating your make automation scenario
Log in to make.com and click on Create A New Scenario

Add the Webhook Module, and choose Custom Webhook
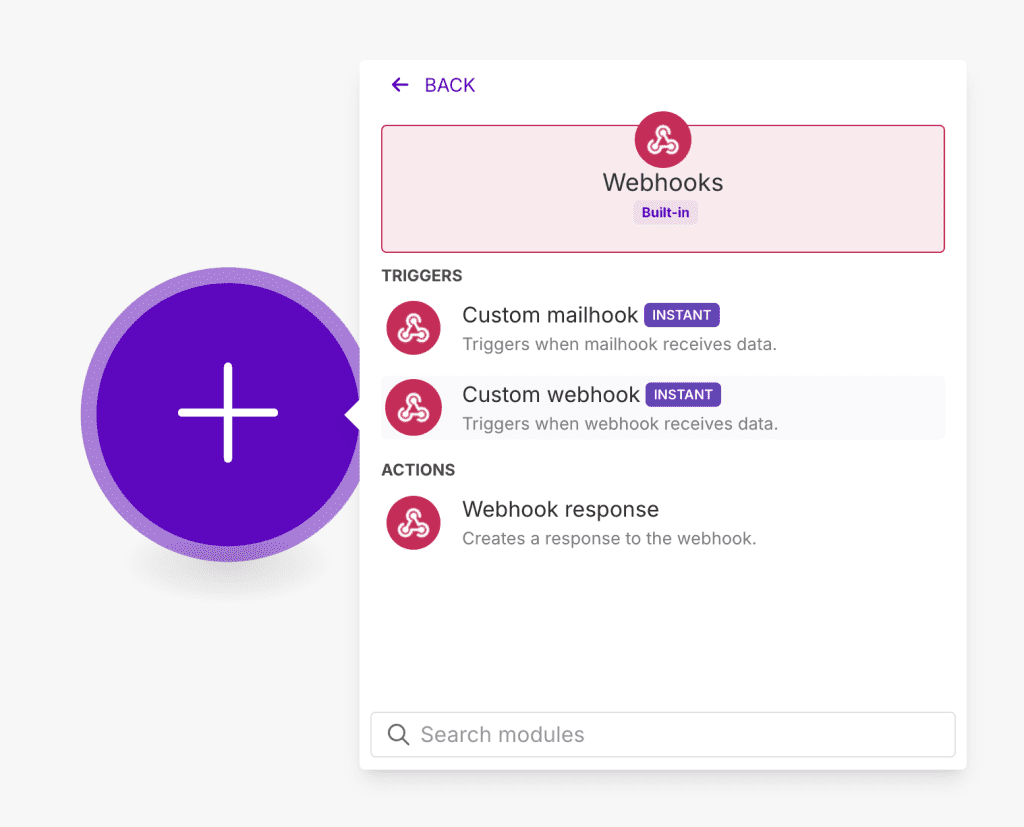
Click on Add and give your webhook a name e.g. “Send to HubSpot” and press Save
Copy the webhook URL to your clipboard.
Now, go to your event admin portal in Just Attend and click on the Automations menu item.
Click Add Automation
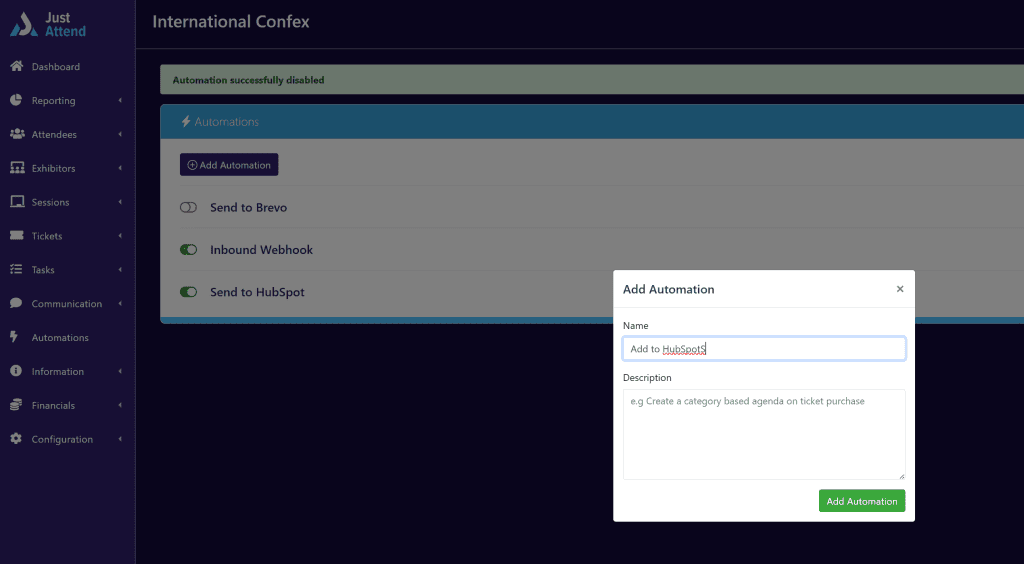
Name the automation Add to HubSpot
Add a New Trigger, select “Ticket Purchase” from the trigger type and then select the tickets you want the rule to be trigger on.

Now add a New Action and choose “Send to Webhook”

Paste the webhook URL you copied from Make into the webhook URL. Change the webhook method to POST.
Now Enable the automation.
Go back to Make and click on Run Once from the scenario toolbar

This will make the webhook listen for data input.
Now we need to send it some data from Just Attend so it can understand it and let you manipulate it into a format that HubSpot requires.
To do this, go back to your Just Attend automation rule and click on Test Automation. This will send a sample payload request to your Make webhook.
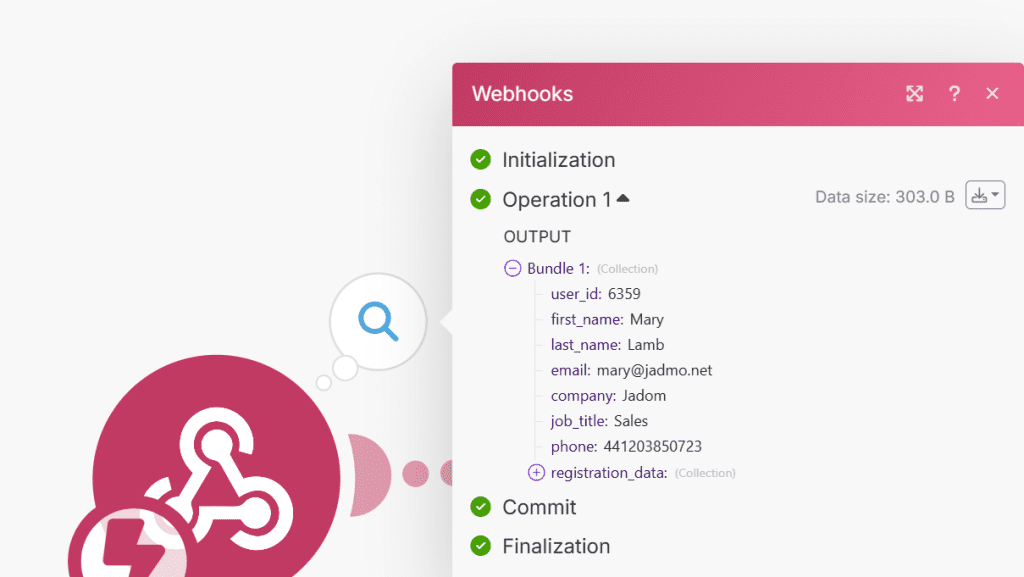
Now go back to Make and determine if your webhook received the data. You should see a bubble with a number 1 in it. Click on that to view the data bundle.
Now add a new module, type in HubSpot and search for Create or Update a Contact
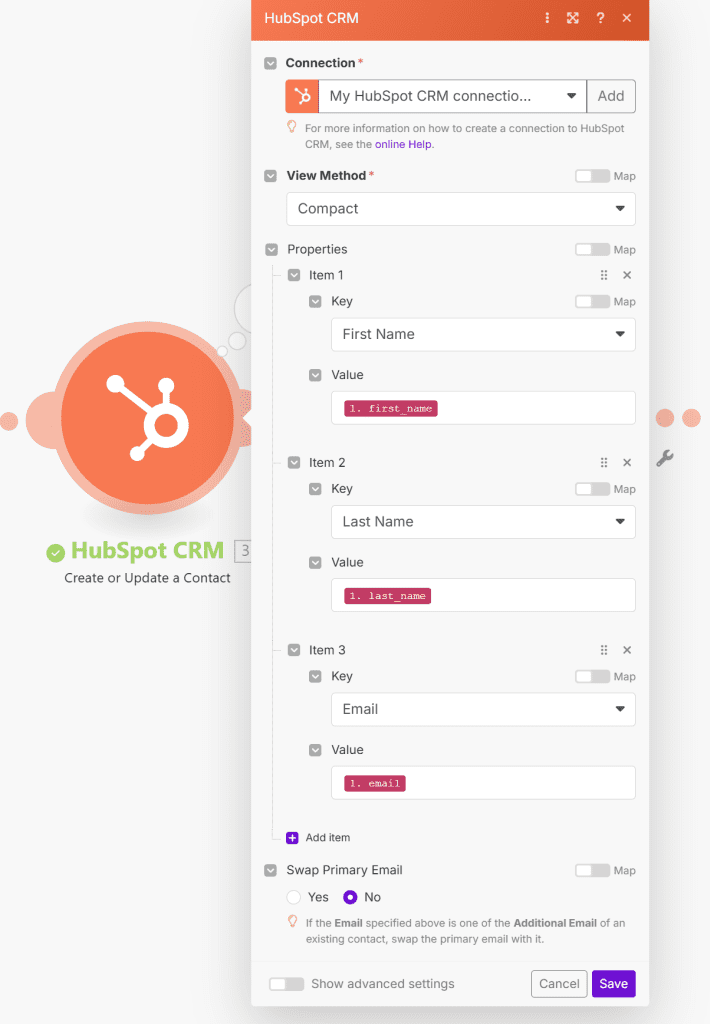
You’ll need to authenticate with HubSpot, so when prompted do so and grant the permissions required.
Once authenticated, click on Add Item and choose the keys to map data to. For example, First Name, Last Name, Email.
In the value of each key choose the data variable from the webhook output that matches the key name in HubSpot.
Now we need to create an Order to record the purchase of the ticket.
Add another HubSpot module, this time Create an Order
You may need to authenticate again with HubSpot for the required permissions.
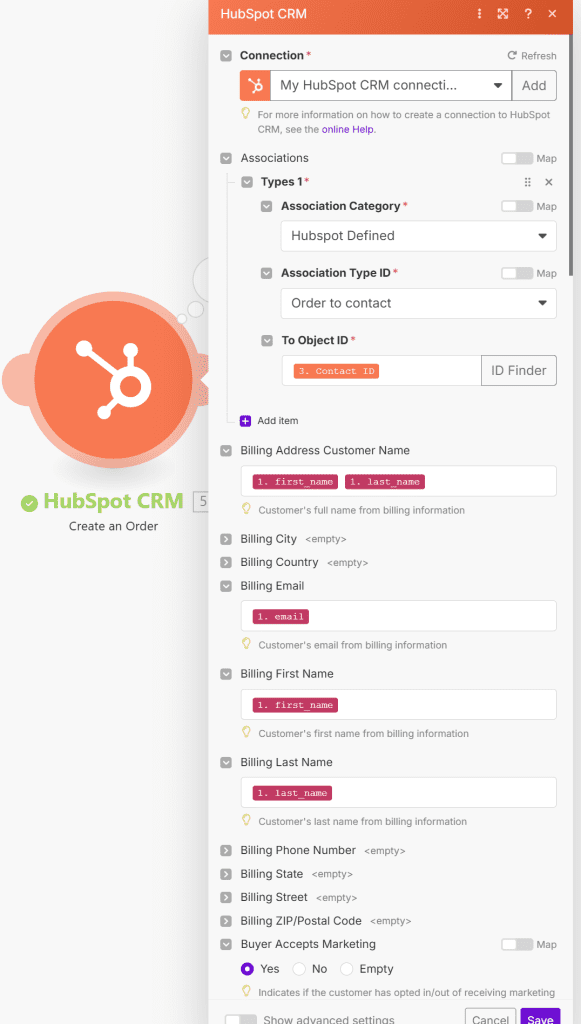
You’ll need to associate the order with the HubSpot contact, so expand Associations, set the association category to HubSpot Defined and the association type ID to Order to Contact and the objectID set to the Contact ID output from the previous HubSpot module (Create or update user).
Now complete the order fields by putting into the values the variable data from the webhook output.
For example, Billing email, name, price, payment status etc. and press Save.
Next you might want to add the attendee to your marketing list, so add another module, again HubSpot and select Add Member to List
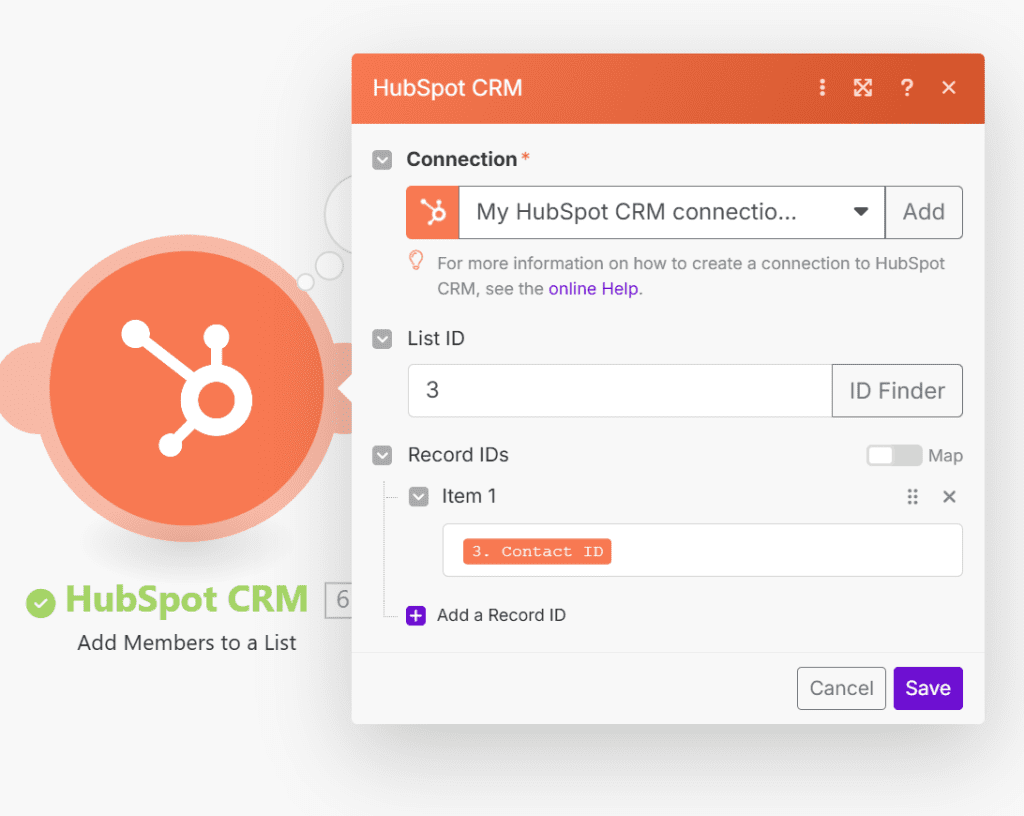
Add the List ID you want the contact to be added to and then in the Record IDs select the Contact ID from the create / update user module and press Save.
Now enable your scenario
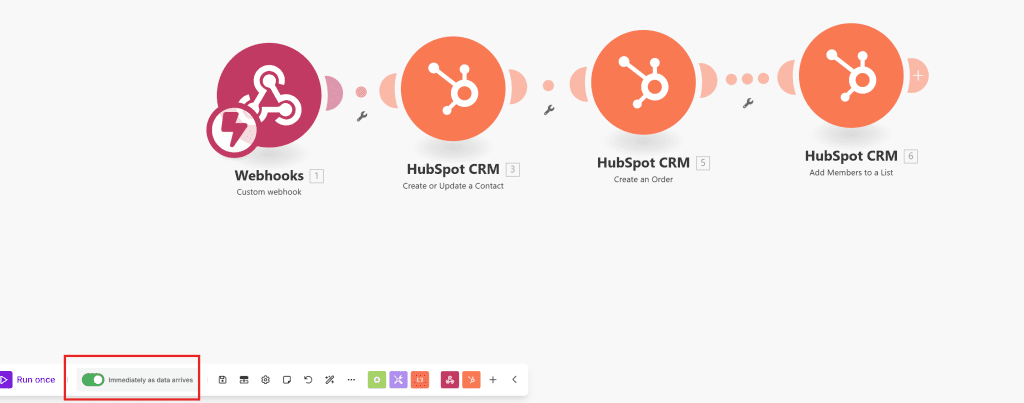
Now your automation is set up, you can wait for your next registration to process. When that has happened you’ll see your HubSpot record for the attendee update with their order.
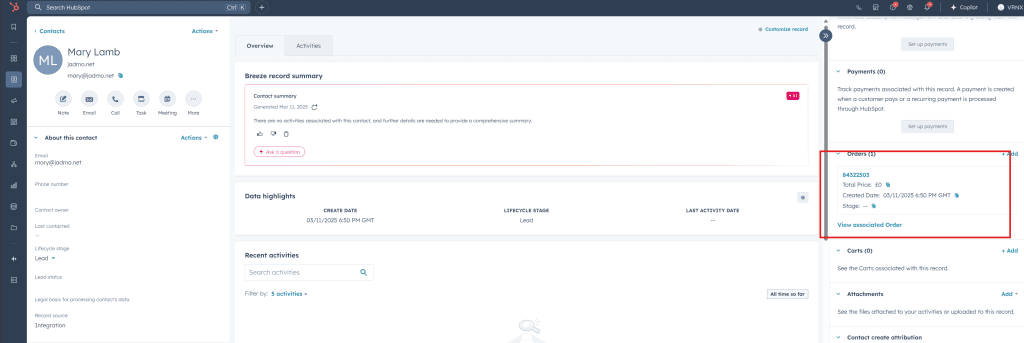
You’ll also see them added to your marketing list


