
All prices when you enter a cost against a ticket are inclusive of any tax required. Therefore when setting your ticket price, set this to the amount the attendee will pay including any taxes due.
When an attendee purchases a ticket, they will be able to download an invoice for their purchase from their account page.
The invoice will show the tax break down and your company information so they can process it with their accounts team.
To setup your tax settings, follow the below process.
Login to your admin portal and go to Setup > Event Details > Tax / Invoice Settings
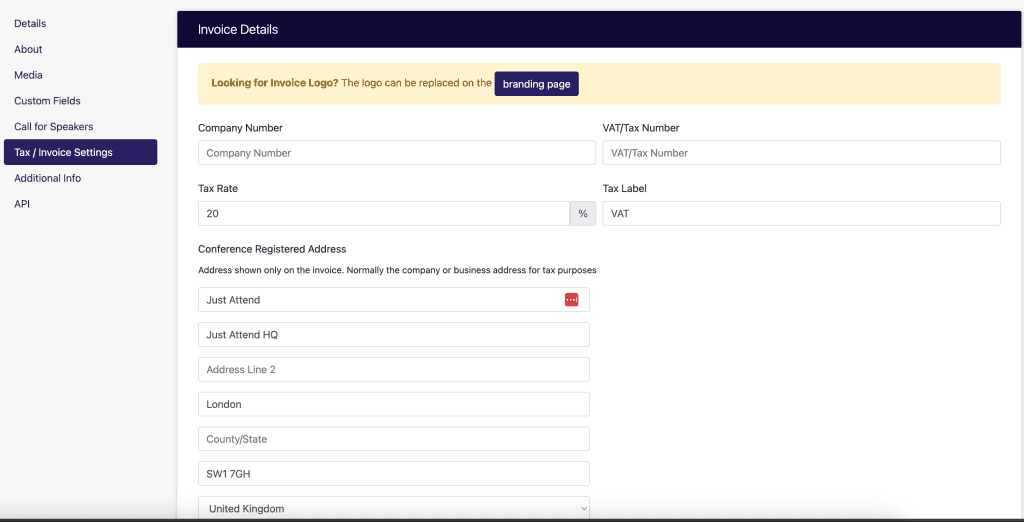
Complete all fields that are relevant to your business setup.
- Company Number – this is your company registration number supplied by your government company register
- Tax Rate – the taxable rate for your country e.g. 20 (percentage)
- VAT / TAX Number – this is your company tax or VAT registration number e.g. GB123456789
- Registered Address – this is your company’s registered name and business address
There is an optional footer message you can enter e.g. “thank you for your business” if you wish to put anything in the invoice footer. This doesn’t accept any variable data.
Invoices
Invoices are automatically generated when an attendee creates a transaction (purchases a ticket). They are downloadable from their account page.
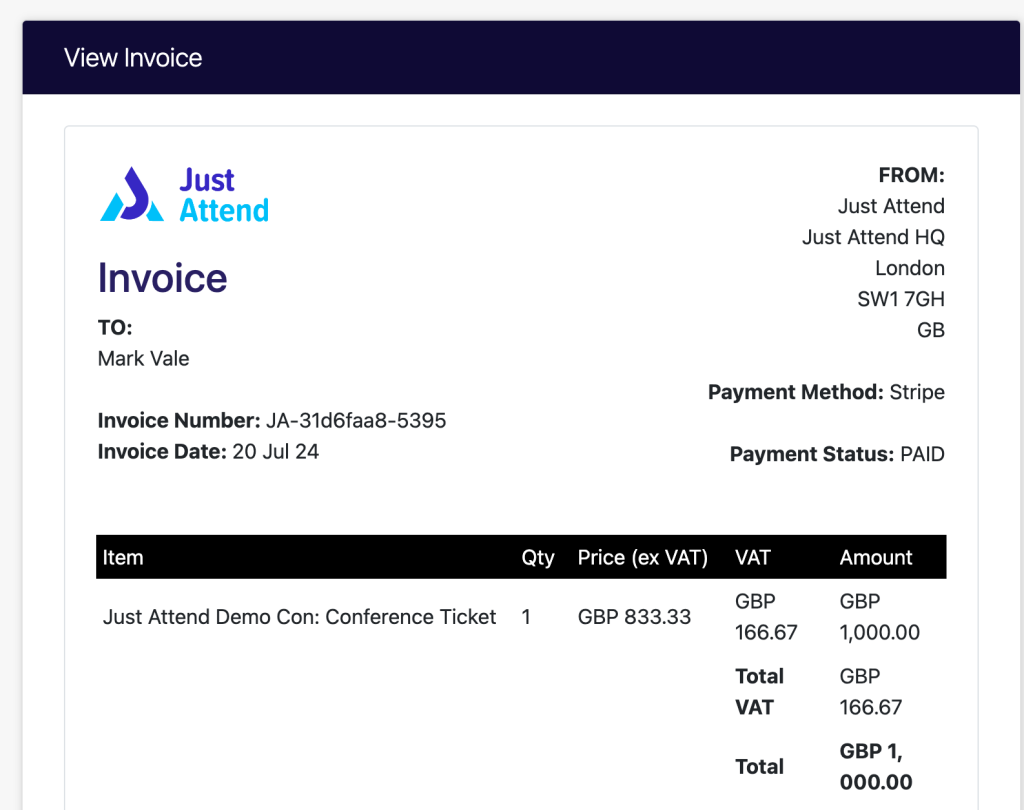
When invoices are generated, your company information will be displayed on the invoice to comply with accounting best practices.
The invoice number is formulated with a JA prefix which indicates the invoice was generated by Just Attend. The next 8 characters relates to your specific Event ID and the last numerical block is the Transaction ID of the transaction.
Invoices can be emailed, edited, and downloaded from the admin portal too.
Editing an Invoice
An invoice can be edited in two ways:
- By the purchaser in their personal account area
- By the organizer in the admin portal
Only the billing information can be edited for an invoice. The item and amount paid cannot.
Editing an Invoice as the purchaser
The purchaser can login to the front end of your event portal using the account they purchased the ticket with. From there click on My Account
From their account page, click on Billing tab
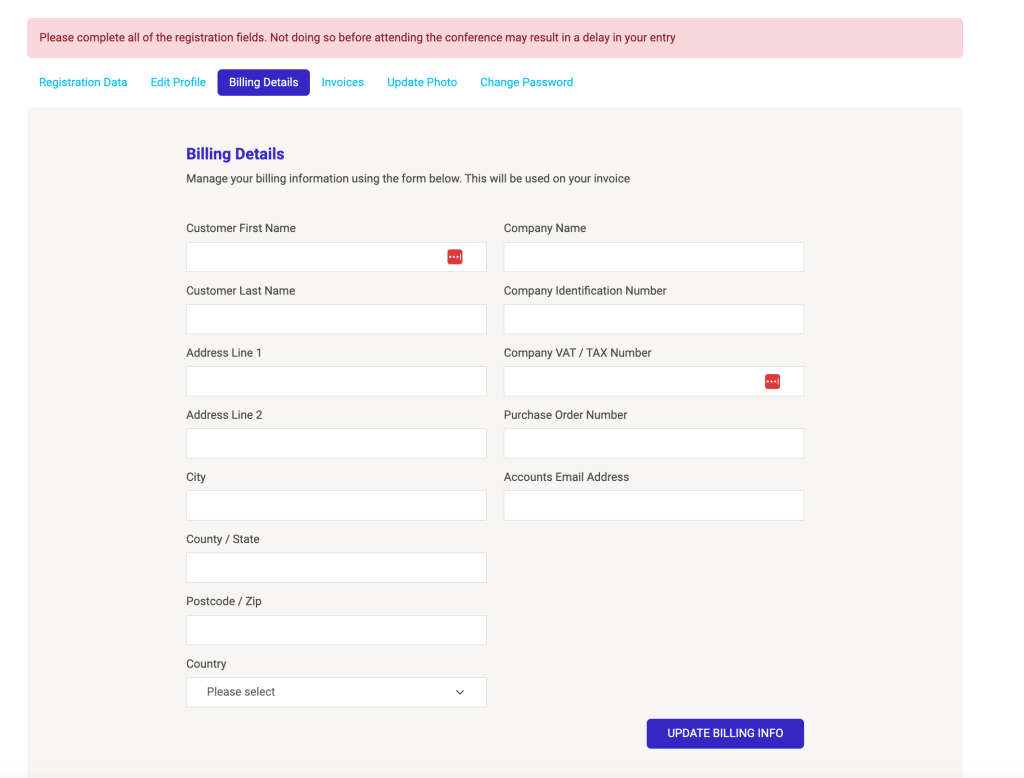
Here they can add the business name and address they want the invoice to be made out to.
Press Update Billing Info then click on the invoices tab and download the invoice
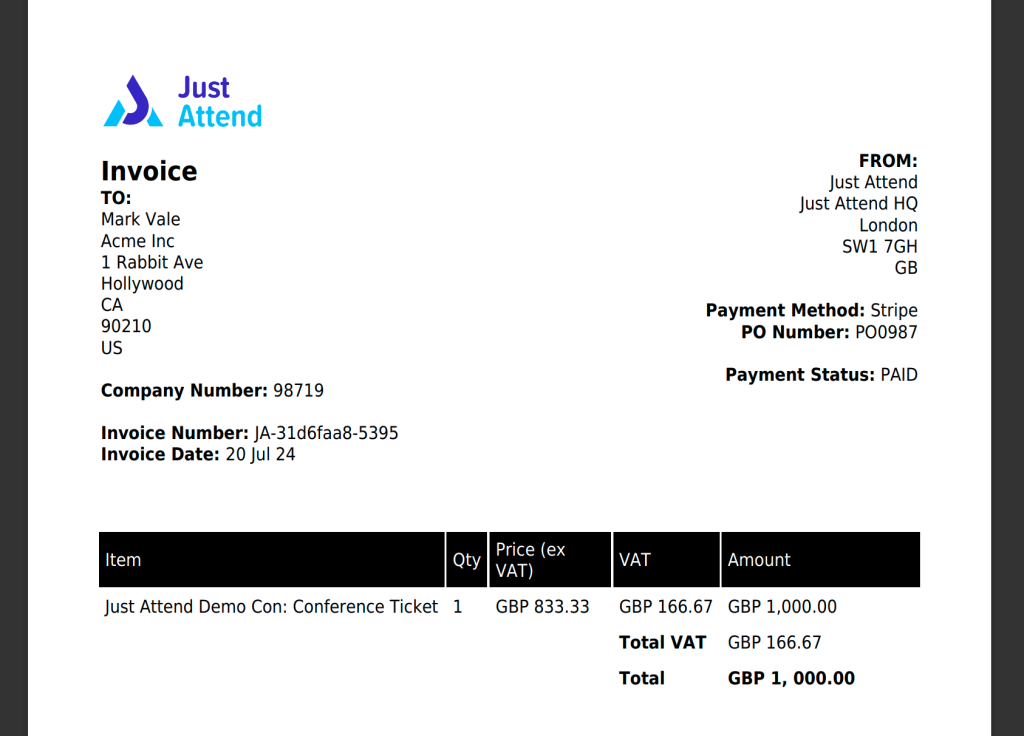
Editing an invoice as a conference organizer
If you are asked to update an invoice on a customer’s behalf you can do this from the admin portal.
From the admin portal go to Financials > Transactions
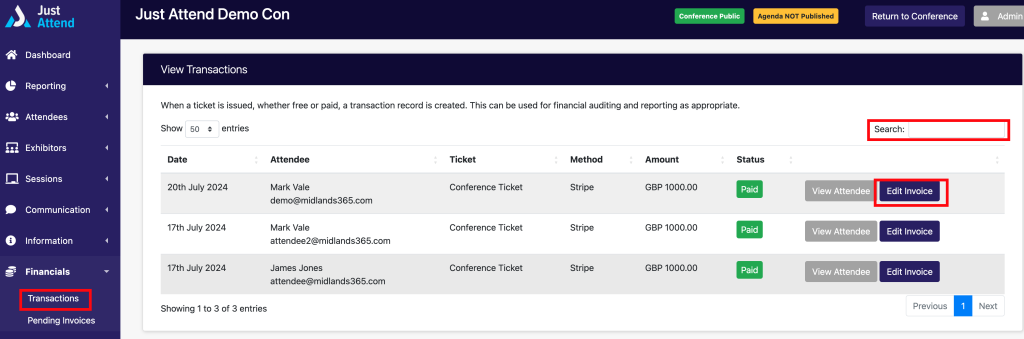
Search for the person by name or email address and press Edit Invoice
You can also find the user directly in attendees list, then edit the attendee and scroll down to transaction history and click the edit invoice button to do the same.
From here you can edit the billing information as you need.

When edited and updated, click on the email invoice button to send the invoice to the purchaser’s email address or download it as a PDF and send it externally.