
Typically we don’t offer networking of printers with our tablets for rental only services. This is because there are many variables that can complicate setup that we can’t easily help you with over the phone or email.
However, if you feel confident and have some networking experience, then it is possible to provide a networked service provided that you understand that you will be responsible for onsite troubleshooting with your venue.
Why Network
Our Epson C3500 printers are robust and capable of high speed printing. When connected using USB cable, these printers can only print from one tablet or laptop. This reduces their efficiency and increases your solution costs.
The benefit of the USB solution is simplicity and its out of the box plug and play design making it easy for you to setup your check-in station in as little as 10 minutes. The downside is, the larger your event, the more printers and laptops you need and this increases rental, shipping, and consumable costs.
This is where networking a printer can save you considerable money. The most efficient setup is a 2 tablet / laptop to one printer solution. This allows you to get double the efficiency out of the printer with little to no impact to attendee check-in waiting times.
When networked in a 2:1 configuration, the printer can sit conveniently in between the tablet computers offering you two unobstructed lines for check-in.
By reducing the number of printers, you are reducing your printer rental cost, reducing shipping costs, and reducing the amount of ink you need vs a comparable USB solution.
However, it does come with increased complexity and pre-requisite requirements you need to arrange with your venue. As a result you should be experienced in creating simple computer networks and have a fundamental experience in basic troubleshooting and testing.
We do try to make the networked solution as plug and play as possible by pre-configuring our equipment and supplying our own managed router which keeps the complexity to a minimum.
Pre-requisites
In order to use the networked solution you must have pre-arranged with your venue the supply of hardwired internet to your check-in area.
They must supply 1 x CAT5/6e cable to the installation point that has been activated for internet access.
Their network must supply an IP address automatically using DHCP and this IP address must be able to access the internet without the need for authentication by proxy or other means.
Minimum bandwidth required is 10Mbps.
Without this being supplied, the tablet computers will not be able to connect to the internet and therefore won’t be able to check your attendee’s in or print their badges.
** We can supply a 4G capable router with a data SIM for additional charges, but these are subject to country and the physical installation location. We cannot guarantee reception or service due to building layout and materials, so hard wired is always preferable.**
Our Network Configuration
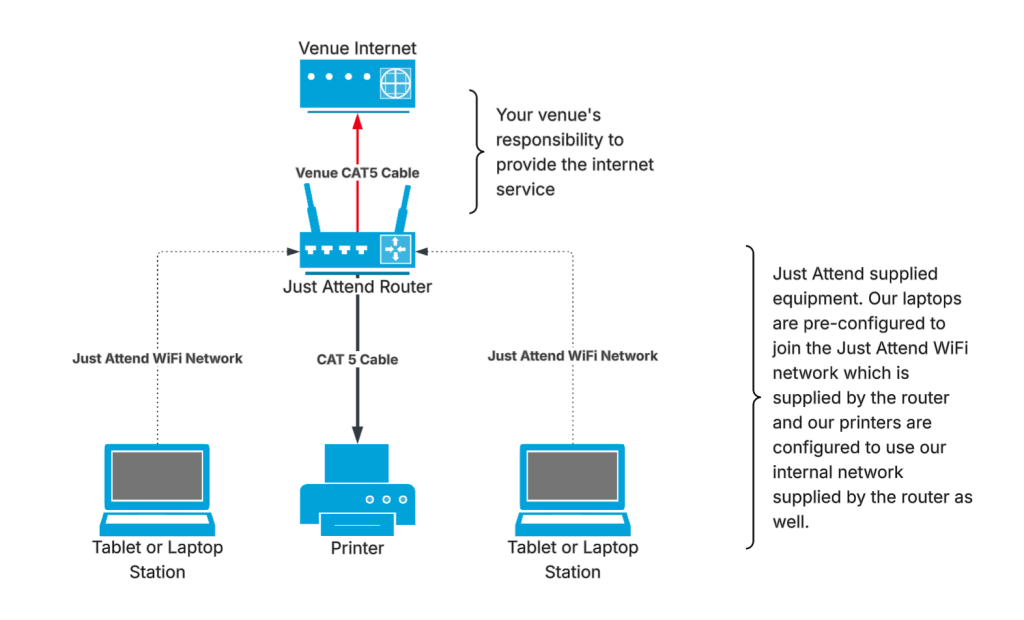
This is an example of a basic network setup. You connect the router to the venue internet using the venue supplied cable and connecting it to the WAN port on the router.
The WAN port is set to auto detect and should work out of the box if the venue supplies an IP address and default gateway via their DHCP service.
Once this is connected, we will be able to manage the router from our cloud management portal.
Our printers will need to be connected to the router using the supplied Cat 5 ethernet cables. Connect one end to the ethernet port on the back of the printer and the other end into the router’s LAN port. It doesn’t matter which one, as long as it says LAN.
For larger installations you may be supplied with a network switch. If you are, connect the uplink port on the switch to one of the router’s LAN ports and then connect the printers to any port on the network switch.
If the switch doesn’t have a dedicated uplink port labelled, use any port to connect to the router. The most common method is to use the first or the last port as the uplink in this case.
The laptops and tablets are pre-configured to join the WiFi network being broadcast from our router. The WiFi network will always be called justattend.
The WiFi password will always be set to: justattend2601
Make sure these remain connected to this network and don’t join them to the venue WiFi otherwise they will not be able to connect to the printers.
IP Addressing
Our router will always have a LAN address of 192.168.89.1
The venue supplied internet connection must not have an IP address between 192.168.89.1 and 192.168.89.254 If they do, then this will conflict with our network address and the router will not be able to connect to the internet.
Our DNS servers are 1.1.1.1 and 8.8.8.8. These will be supplied to all laptops automatically.
Our laptops will connect in the DHCP range of 192.168.89.100 through to 192.168.89.240. It doesn’t matter what IP address they receive from the router as long as it is within this range.
Our printers will also be DHCP, but will have reservations configured in the router which essentially ensures they remain static.
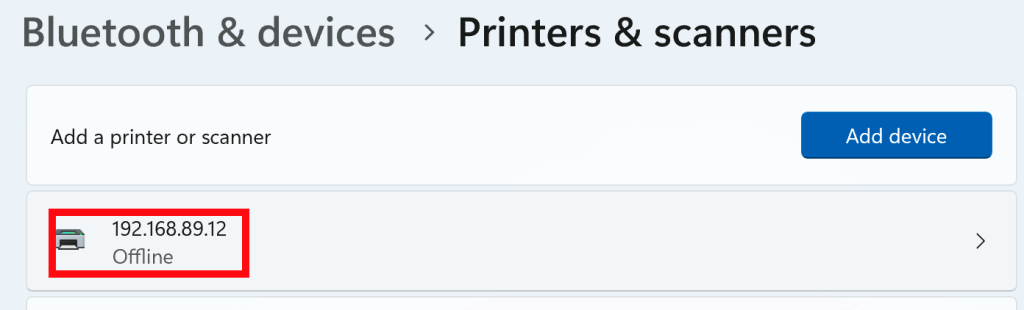
Printer IP addresses will be in the range of 192.168.89.10 through to 192.168.89.99. The IP address of the printer will be visible on a service sticker attached to the rear of the printer near the network port.

Printer Configuration on Tablet / Laptop
All laptops and tablets will have the printers you have been assigned added to their print queues. They will be named as the IP address that relates to the printer.
You will be able to use any laptop with any printer, simply set the required printer in the kiosk app.
Wiring up the Router (Basic)
Our routers are either TP Link ER605 or TP LINK ER706 models. Both models are exactly the same to wire up. Follow the diagram below to properly cable up the router.

When you power on the router, it can take between 2 and 5 minutes to complete it’s power on cycle. The SYS light on the router should be flashing and activity lights visible on the connected ports when it is ready.
As long as the venue’s internet connection is as per specification, the router should connect to the internet without any interaction or onsite configuration.
Mesh WiFi for large deployments
For larger deployments or where your registration kiosks are split into more than one location, we can provide a Mesh WiFi network.
A Mesh network uses multiple wireless access points that connect together over WiFi to extend the range of the justattend wireless network.
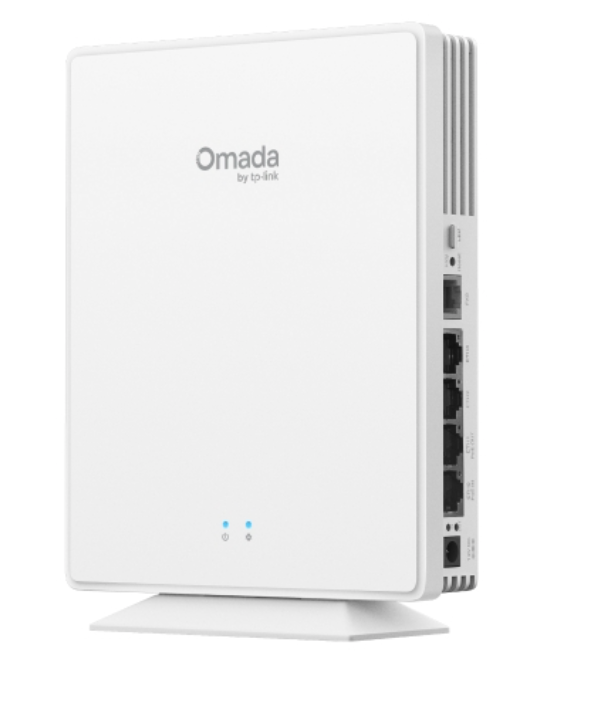
We use the TP Link EAP 650 desktop Mesh wireless access points that have a built in LAN switch that allows our printers to directly connect to the wireless access point by ethernet cable. The wireless access point then operates both as a wireless access point and local network switch allowing us to extend the hardwire network over ‘WiFi’.
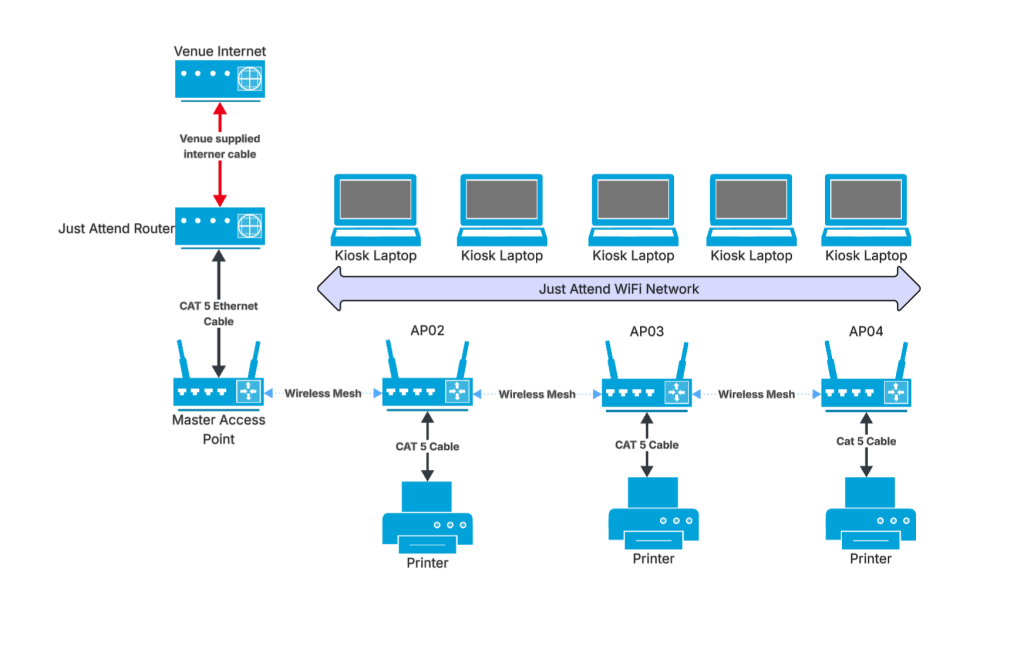
In this configuration you will be supplied with a wired router and wireless access points. The wired router will need to connect to the venue internet using ethernet cable in the same way as the basic network configuration.
You’ll then need to connect the wireless access point labelled Master Access Point to the router using the supplied ethernet cable using any available port on the back of the access point.
The other wireless access points you have been supplied with will be labelled as follows:
- AP02
- AP03
- AP04
- AP05
**You may not be supplied with all 5 access points depending on your requirements**
Power on AP02 at a location no more than 100m away from the Master Access Point. AP02 is configured to create a mesh between itself and the master access point for its network backbone.
Place AP03 at a location no more than 100m away from AP02‘s location. AP03 is configured to create a mesh between itself and AP02 for its network backbone.
Repeat the process for AP04 to AP03 and AP05 to AP04.
You can then connect printers to the network ports on the rear of any AP to make them networkable.
This diagram explains the setup
You can have up to 4 printers connected to each access point without requiring a network switch to increase the number of ports. If you need more than 4 per access point, we can supply a 12-port network switch that will extend the capacity further.
Summary
Although this article might appear daunting, we have worked hard to try and make networking as plug and play as possible.
In many cases it will be plug and play as long as the venue’s internet supply is as our specification. If it is, everything should work out of the box without any specialist need for network troubleshooting.
The most likely scenario where it doesn’t work will be where the venue internet is not to specification or there is a problem with it.
Unfortunately in this situation it is very hard for us to help you remotely as without access to our router, we have no way of logging in and making any changes. This is why you’ll need to be a little familiar with networking concepts in order to book this service. If you’re not, we recommend reverting to the standard USB plug and play solution.
Frequent Answers
- We cannot create a network using the default venue supplied WiFi as many WiFi networks explicitly block any client to client discovery or networking capability.
- We cannot share a USB connected printer from one kiosk to another as this requires WiFi sharing which will not be possible on venue wireless guest networks.
- You must arrange with the venue the facility of hard wired internet connection at your own cost. Many venues have security measures in place that don’t allow you to connect a cable into an available ethernet port you may find. Always pre-book this service before your event.
- You cannot use our network or WiFi network as a guest network for normal internet access for your attendees. Doing so compromises your bandwidth and reliability of the kiosks connectivity.
- We can supply 4G data SIM in our routers as a connectivity option. However, this is only for a backup solution and should not be used instead of the venue’s hardwired connection. This is because we are unable to certify whether you will have good signal strength at the installation point. For example, if your event is in a basement of a Hotel with no outside access, then mobile signal may be problematic.