
With the latest update of our check-in kiosk you can now send a badge print job directly to the check-in kiosks from the event admin web portal.
This saves time and makes it easier for onsite registration or badge data changes to be completed by removing the manual step of scanning a QR code from your admin machine on the kiosk computer.
Before you begin
The kiosks are not enabled for remote printing by default. This is because we want to give you the control to decide which kiosk(s) will participate in remote printing so you can setup your registration area accordingly.
To enable this, go into the admin area of the kiosk, then click Conference Settings
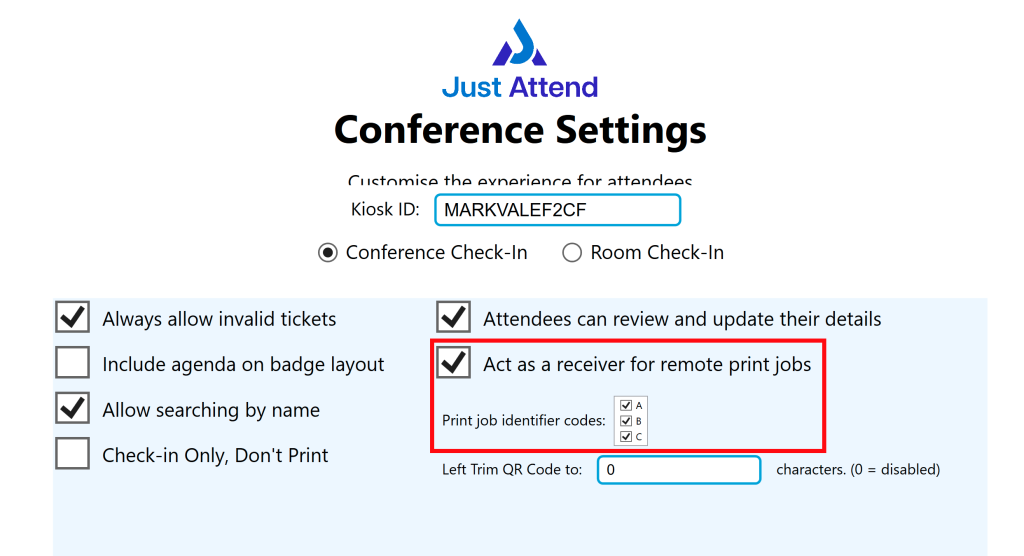
Check the box to “Act as a receiver for remote print jobs” to enable remote print.
You’ll notice the “print job identified codes” of A, B, or C. When you send a remote print job, the server will randomly place the print job into either print queue A, B, or C. You cannot manually steer the print job to a specific queue.
We have done this so that you can choose up to 3 kiosks to accept remote print jobs without the risk of printing a badge on all 3 kiosks at the same time.
We recommend that only one kiosk is assigned to each identifier code. If more than one kiosk is assigned the same code, then you may get duplicate badges printed.
If you only intend to use one kiosk for remote printing, select all identifier codes and press save.
Now this has been set, enter kiosk mode.
Using Badge Remote Print
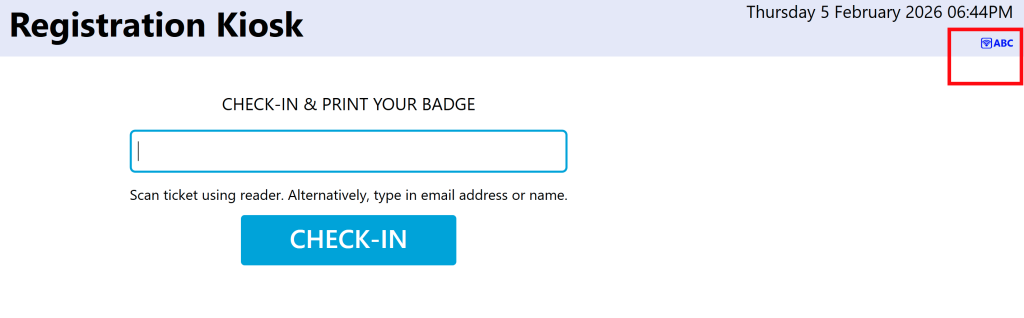
When the kiosk has been configured to accept remote print jobs, you’ll notice a new icon on the kiosk mode home screen. This will tell you the print queue(s) it’s connected to.
Now from the event portal you can find an attendee, click on either their ticket number in the table list, or click on the view button to view the attendee details. From their identity block you’ll see a button called add to print queue.

This will add the attendee’s badge to the print queue. The kiosk checks every few seconds for pending print jobs. If one is found, it is printed without interrupting anyone else using the kiosk at the same time.
Once the badge is printed, the kiosk removes the print job from the queue.
Important Notes
- Where an attendee has more than one badge role assigned to them, remote print will print the badge design associated to the highest priority role assigned to the user. For clarity, the prioritization order is as follows:
| Role | Priority |
|---|---|
| Attendee | 1 (Highest) |
| Speaker | 2 |
| Exhibitor | 3 |
| Press | 4 |
| Staff | 5 |
| Custom Role 1 through 4 | 6 (lowest) |
If you want to print a certain badge design for a role with a lower priority, please do not use remote print. Instead, ask the attendee to scan their QR code or enter their name (if search by name is enabled) on the kiosk manually.
- Remote printing will only work if the kiosk enabled for it is connected to the internet. If the venue internet is disconnected, remote print won’t work until the kiosk is reconnected to the internet. At this point, all pending remote print jobs will be printed.
To avoid potential wasting of badges, if an outage occurs, we recommend you purge the print queue in the event admin portal under Attendees > Print Queue > Delete All - Your laptop connected to the event admin portal doesn’t need to be connected to the same WiFi network or even in the same room or venue as the kiosk. However, please bear in mind that remote print jobs are printed on an as soon as possible schedule, so once a kiosk becomes idle, it will look for a print job and print it.